Learn more


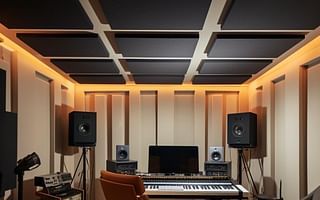
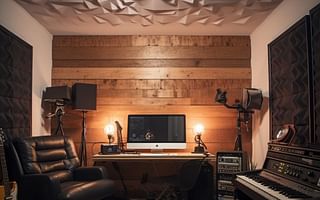
Creating the perfect sound environment in your home studio is an art. It requires a deep understanding of acoustics and a keen ear for detail. One of the most effective ways to improve the sound quality in your studio is by installing acoustic panels. These panels help to control the sound reflections within the room, providing a cleaner and more accurate listening experience.
Our step-by-step guide above walks you through the process of installing acoustic panels in your home studio. But before you get started, it's important to understand a few key concepts.
Acoustic panels play a crucial role in managing the acoustics of a recording studio. They help to absorb excess sound, reducing echo and reverberation. This results in a more controlled sound environment, which is essential for accurate audio recording and mixing.
There are different types of acoustic panels available, each designed to address specific acoustic issues. The right choice depends on your studio's unique needs. For instance, bass traps are designed to absorb low-frequency sounds, while diffusers scatter sound waves, reducing echo without over-damping the room. Our guide on suggested soundproof foam for a home recording studio provides more insight into this.
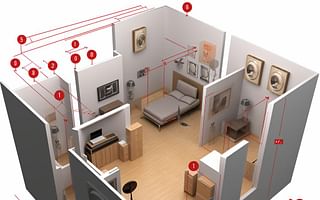
The placement of acoustic panels is just as important as the type of panels you choose. Placing them at the reflection points in your studio will maximize their effectiveness. If you're unsure about where to place your panels, check out our FAQ on optimal acoustic panel placement.
Remember, the goal is not to completely deaden the room but to create a balanced sound environment. Once your panels are installed, take the time to test the sound quality and make any necessary adjustments.
With a bit of patience and the right approach, you can dramatically improve the acoustics of your home studio. Whether you're a seasoned audio professional or just starting out, these tips will help you create a studio that's perfectly tuned to your needs.
Acoustic treatment doesn't have to break the bank. There are plenty of affordable options available for those on a tight budget. For more tips on how to improve your studio's acoustics without spending a fortune, check out our guide on improving studio acoustics on a budget.
All Rights Reserved © 2025