
Understanding the Basics of Soundproofing: What You Need to Know
Welcome to the world of DIY home studio soundproofing! Whether you're an aspiring podcaster, a budding musician, or a seasoned audio engineer, soundproofing is a crucial aspect of creating a professional-grade home recording studio. But what exactly does soundproofing entail, and why is it so important?
Soundproofing is the art of minimizing the transmission of sound between spaces. In the context of a home recording studio, it's all about creating an environment where the only sounds you capture are the ones you want. Without proper soundproofing, your recordings may pick up unwanted noise from outside your studio, like traffic, neighbors, or even the hum of your own household appliances. This can compromise the quality of your recordings and make post-production a nightmare.
But don't fret! This home studio soundproofing guide is here to help you understand the basics and navigate the process of optimizing your home studio sound. We'll explore the best soundproofing materials for your studio, guide you through a step-by-step DIY soundproofing process, share tips for optimizing your sound, and even help you avoid common soundproofing mistakes.
So, are you ready to take your home recording studio to the next level? Let's dive into the fascinating world of soundproofing and discover how to create a space that allows your creativity to truly shine.
Choosing the Best Soundproofing Materials for Your Home Studio
Now that we've covered the basics, let's delve deeper into the heart of DIY home studio soundproofing - choosing the right materials. The materials you choose can make or break your soundproofing efforts, so it's crucial to make informed decisions. But with so many options available, how do you know which ones are the best for your home studio?
Firstly, it's important to understand that the best soundproofing materials for your home studio will depend on your specific needs and circumstances. Are you recording a podcast with spoken words or are you a musician recording instruments? The type of sound you're working with can influence the materials you should use.
One of the most popular choices is mass-loaded vinyl (MLV). This dense, yet flexible material is excellent at blocking sound waves, making it a great choice for walls and ceilings.
Another top contender is acoustic foam. This material is best used for absorbing echo within your studio, optimizing your home studio sound by reducing reverberation.
Don't forget about soundproofing curtains or drapes. These can be a cost-effective solution for windows or doors, preventing outside noise from entering your studio.
Lastly, consider the use of resilient channels. These metal strips are used to create a gap between your studio wall and the drywall, providing an extra layer of soundproofing.
Remember, the goal of soundproofing a recording studio is not only to keep unwanted noise out but also to ensure the sound within your studio is clear and crisp. So, are you ready to start your journey towards the perfect home recording studio soundproofing? Let's move on to our step-by-step guide!
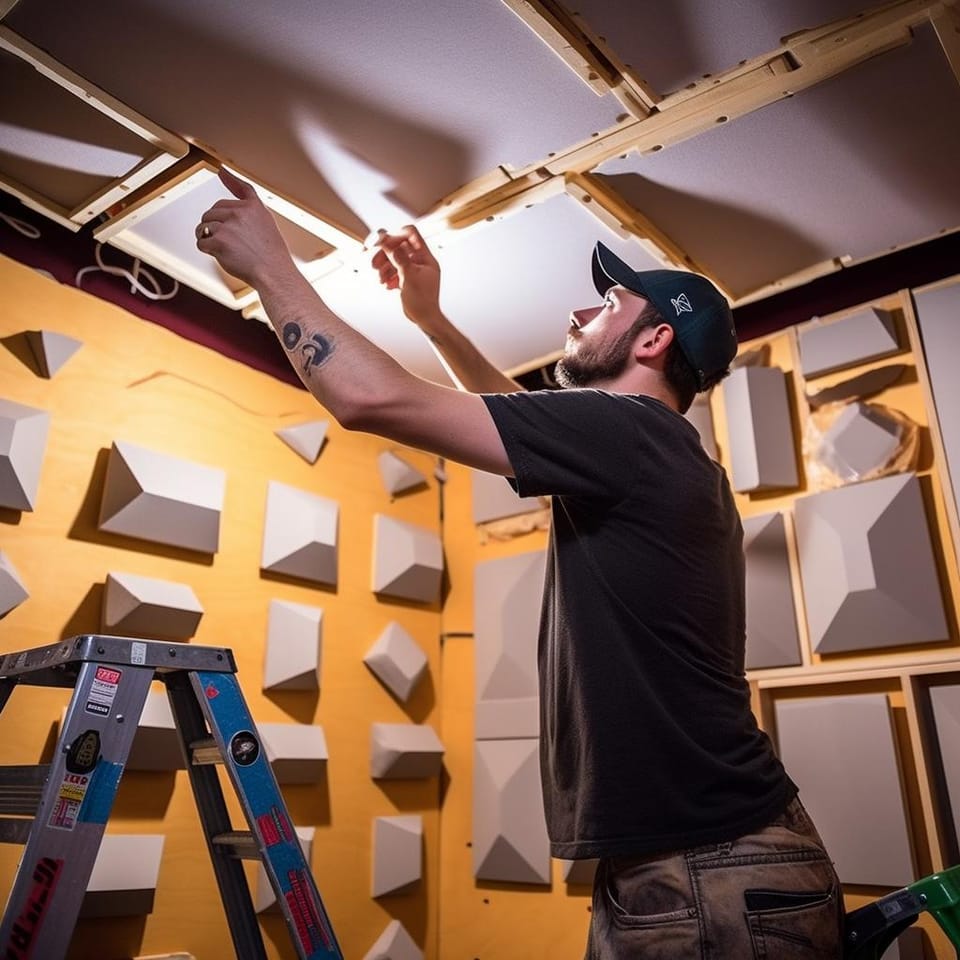
DIY Home Studio Soundproofing: Step-by-Step Guide
Embarking on the journey of DIY home studio soundproofing can be both exciting and daunting. But fear not, we're here to guide you through this process, step by step. Let's dive in!
First, identify the areas in your studio that need soundproofing. Is it the walls, the ceiling, or the floor? Or perhaps it's all of them? Once you've identified these areas, you can start planning your soundproofing strategy. Remember, the goal is to create a space where sound can be controlled and optimized for your specific needs.
Now, let's put those soundproofing materials we discussed earlier to good use. Start with the walls. If you've chosen to use mass-loaded vinyl, you'll want to attach it directly to your wall. This can be done using adhesive or screws. If you're using acoustic foam, it's best to attach it to your walls using adhesive spray or mounting tabs.
Next, consider your ceiling and floor. If noise from above or below is a concern, consider laying down some MLV or installing resilient channels on your ceiling. These channels can help create a soundproof barrier between your studio and any potential noise sources.
Don't forget about your doors and windows! Soundproofing curtains or drapes can be a simple yet effective solution for these areas. If you're looking for a more robust solution, consider installing a soundproof door or window.
Finally, remember to seal any gaps or cracks in your studio. These can often be overlooked, but they can be a major source of sound leakage. Use acoustic sealant for the best results.
And there you have it - a step-by-step guide to optimizing your home studio sound. Remember, soundproofing is not a one-size-fits-all solution. It requires careful planning, patience, and a bit of trial and error. But with these tips in hand, you're well on your way to creating a home studio that not only sounds great but feels professional too. So, what are you waiting for? Let's start soundproofing!
Soundproofing Tips for Optimizing Your Home Studio Sound
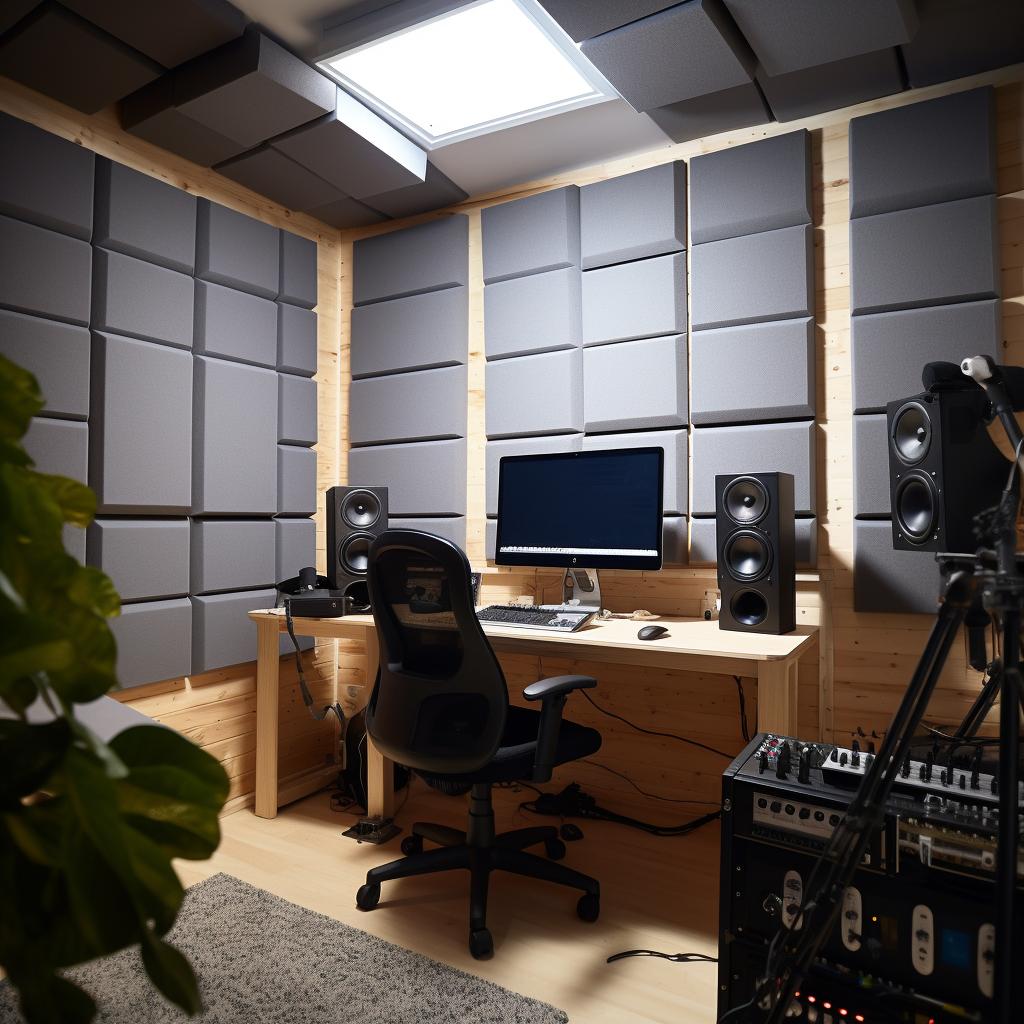
Now that you've got the basics down, let's delve deeper into some soundproofing tips for optimizing your home studio sound. Remember, the key to a successful home recording studio soundproofing lies in the details. It's all about creating a space that's acoustically balanced and free from unwanted noise. So, how do you achieve this?
Firstly, consider the layout of your studio. Are your speakers placed correctly? Is your recording equipment in the right spot? The positioning of your equipment can greatly affect the sound quality in your studio. For instance, placing your speakers too close to the wall can cause bass buildup, resulting in a muddy sound. To avoid this, try to position your speakers at least a foot away from the wall. This simple adjustment can make a significant difference in your sound quality.
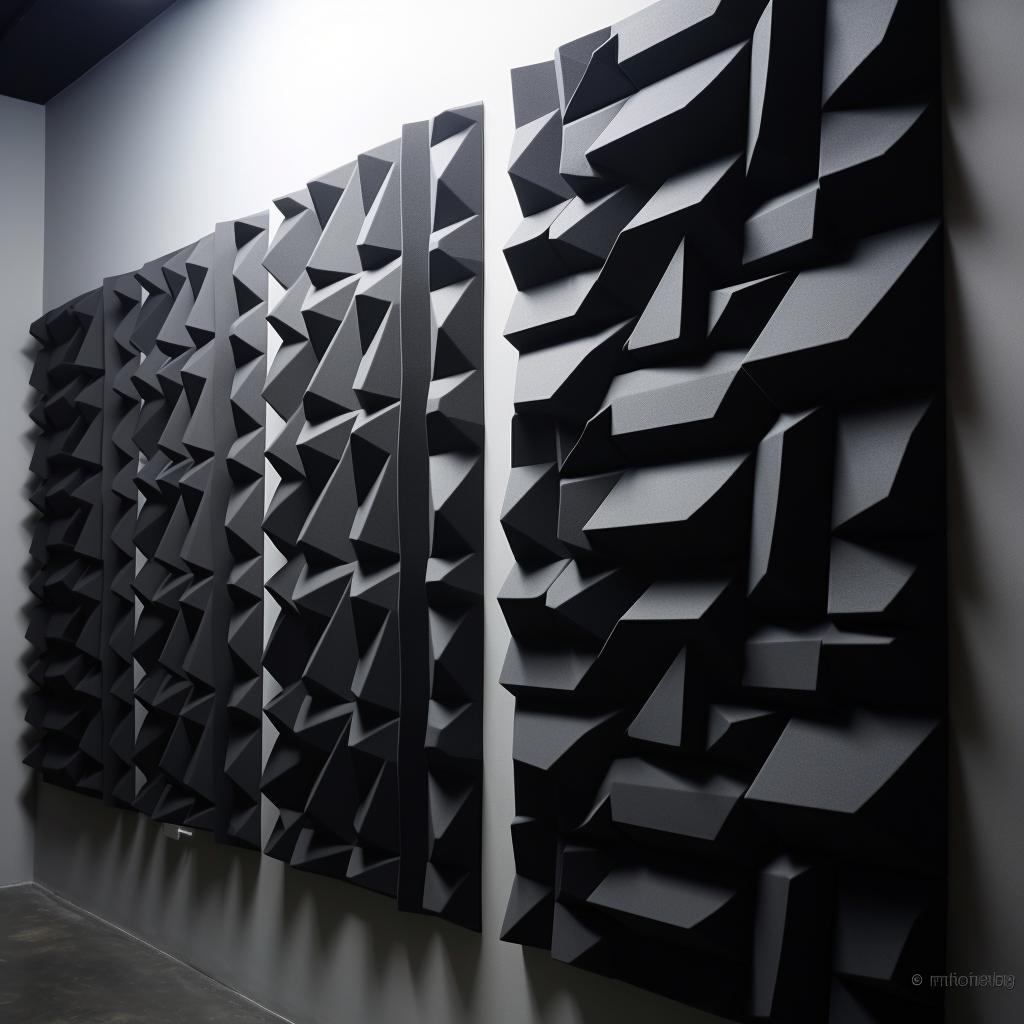
Next, think about the surfaces in your studio. Hard surfaces can cause sound to bounce around, leading to echo and reverb. To combat this, consider adding some diffusers to your studio. These handy devices can help scatter sound waves, reducing echo and creating a more balanced sound.
Lastly, don't forget about the importance of regular maintenance. Just like any other part of your home, your studio requires regular upkeep to stay in top shape. This includes cleaning your soundproofing materials, checking for any damage, and replacing any worn-out parts. Remember, a well-maintained studio is a quiet studio.
So, there you have it - some practical tips for optimizing your home studio sound. With these tips in hand, you're well on your way to creating a studio that's not only soundproof but also acoustically balanced. And remember, the journey to a perfect home studio is a marathon, not a sprint. So, take your time, experiment with different techniques, and most importantly, have fun with it! After all, isn't that what making music is all about?
Common Mistakes to Avoid When Soundproofing a Home Recording Studio
Now that you're equipped with some essential soundproofing tips for optimizing your home studio sound, let's delve into some common pitfalls to avoid. Even with the best intentions and the most diligent efforts, mistakes can happen. However, being aware of these potential errors can save you time, money, and frustration in your DIY home studio soundproofing journey.
One common mistake is neglecting to soundproof the floor. While walls and ceilings often get the most attention, sound can also travel through floors, especially if they're made of hard materials like wood or concrete. To counteract this, consider adding a layer of soundproofing material under your carpet or flooring. This can dramatically reduce the transmission of sound and help you achieve that crisp, clear sound you're striving for in your home recording studio soundproofing project.
Another common error is using the wrong type of soundproofing material. Not all materials are created equal, and what works best for one studio might not work as well for another. It's crucial to choose materials that are specifically designed for soundproofing, rather than simply using any old insulation material. Research is key here. Make sure you're using the best soundproofing for home studio purposes, and don't be afraid to ask for advice or seek professional guidance if you're unsure.
Lastly, many people underestimate the importance of doors and windows in their soundproofing efforts. Even the smallest gap can let in unwanted noise, disrupting your recordings and compromising your sound quality. Make sure to seal any gaps or cracks in your doors and windows, and consider investing in soundproof doors and windows if you're serious about optimizing home studio sound.
Remember, soundproofing a recording studio is a complex process, and it's okay to make mistakes along the way. The important thing is to learn from these mistakes and use them to improve your studio. With patience, persistence, and a little bit of trial and error, you'll be well on your way to creating a home studio that's not only soundproof, but also acoustically perfect.
So, are you ready to take your home studio soundproofing to the next level? Let's continue our journey with some long-term strategies for maintaining your soundproofing, and some advanced techniques for those of you who really want to push the boundaries of what's possible in a home studio.
Maintaining Your Home Studio Soundproofing: Long-term Strategies
After successfully implementing your DIY home studio soundproofing, you might be wondering, "What's next?" Well, the journey doesn't end here. Maintaining the quality of your soundproofing over time is just as crucial as the initial setup. Let's dive into some long-term strategies that will ensure your home studio remains a sanctuary of sound for years to come.
Firstly, regular inspections are key. Over time, even the best soundproofing for home studio can degrade or shift, compromising its effectiveness. Make it a habit to check your soundproofing materials for any signs of wear and tear. Look for sagging, cracks, or any areas where the material may have become dislodged. If you spot any issues, don't delay in making repairs. Remember, even the smallest gap can let in unwanted noise.
Next, consider the impact of your studio's environment. Is your studio exposed to extreme temperatures or humidity? These factors can affect the longevity of your soundproofing materials. Try to keep your studio's environment as stable as possible, and consider using materials that are resistant to these conditions. A home studio soundproofing guide can provide recommendations on the best materials for different climates.
Lastly, don't forget about your doors and windows. Over time, seals can degrade, letting in more noise. Regularly check these areas and replace seals as needed. And remember, investing in soundproof doors and windows can make a significant difference in optimizing home studio sound.
By implementing these strategies, you'll not only maintain your studio's soundproofing but also continually improve its acoustics. So, are you ready to ensure your home recording studio soundproofing stands the test of time? With a little vigilance and regular maintenance, your studio will continue to be the perfect place for creating and recording your masterpieces.
Advanced Techniques: Taking Your Home Studio Soundproofing to the Next Level
Now that you've mastered the art of maintaining your home studio soundproofing, it's time to take a step further. Are you ready to explore advanced techniques to elevate your home recording studio soundproofing? Buckle up, because we're about to dive into the world of professional soundproofing.
One of the most effective ways to optimize home studio sound is by incorporating a room-within-a-room design. This technique involves constructing a secondary wall or ceiling within your existing structure, creating an additional barrier for sound to penetrate. It might sound complex, but with a little patience and the right tools, it's a feasible DIY home studio soundproofing project.
Another advanced method is the use of diffusers. These devices scatter sound waves, reducing echoes and enhancing the overall acoustics of your studio. Diffusers come in various shapes and sizes, and choosing the right one can make a significant difference in your sound quality.
Don't forget about bass traps. These are designed to absorb low-frequency sound, which is often difficult to control. Placing bass traps in the corners of your room can dramatically improve the sound quality of your recordings.
Lastly, consider investing in professional-grade soundproofing materials. While they might be more expensive, their superior performance can provide an exceptional return on investment, especially if you're serious about your recording endeavors.
By implementing these advanced techniques, you're not just soundproofing your home studio; you're optimizing it for the best possible sound. It's about creating a space where every note, every word, and every sound is captured with clarity and precision. And isn't that what every artist strives for?
So, are you ready to take your home studio soundproofing to the next level? With these tips, your home studio won't just be a place for recording; it'll be a sanctuary for sound, a haven for creativity, and a testament to your dedication to your craft.
Remember, the journey to perfect sound is a continuous one, filled with learning, experimenting, and fine-tuning. But with passion, patience, and the right knowledge, you can transform your home studio into a professional recording space. So, why wait? Start optimizing your home studio sound today!


No comments yet. Be the first to share your thoughts!