
Pick the right microphone first
The microphone is the foundation of any podcast setup. Before you worry about interfaces or AI tools, you need to choose the right input device. The choice between USB and XLR microphones comes down to two things: your budget and how much technical comfort you have with audio gear.
Start with a USB microphone
If you are just starting out, a USB microphone is the most practical choice. These mics plug directly into your computer, requiring no extra hardware. They are plug-and-play, which keeps the learning curve flat and the initial cost low. This simplicity makes them ideal for solo podcasters who want to record quality audio without setting up a complex signal chain.
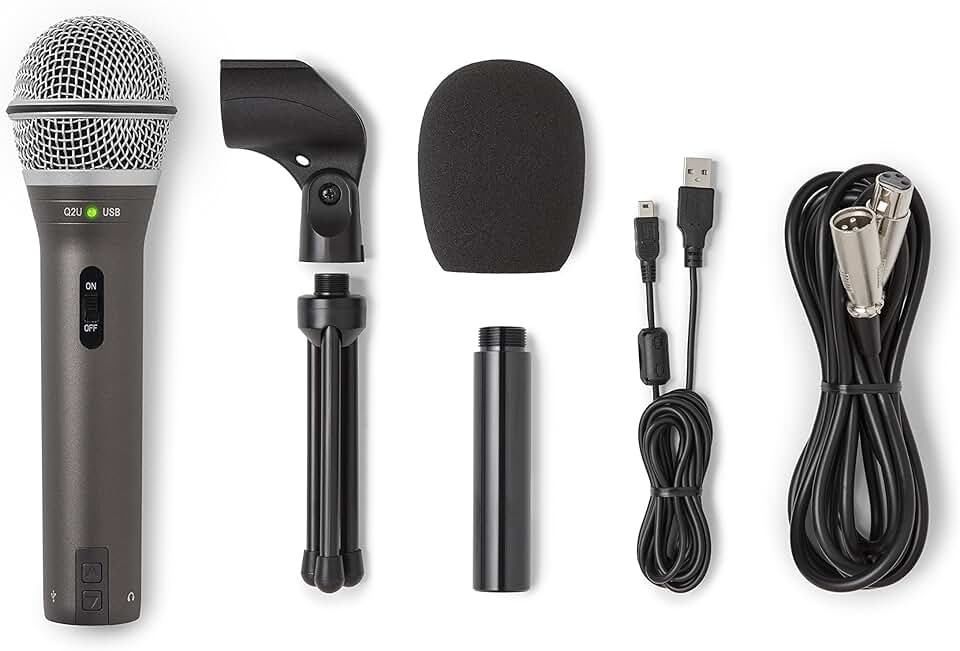
The Samson Q2U is a top recommendation for beginners. It offers both USB and XLR connectivity, giving you room to grow if your podcast setup expands later. For those on a very tight budget, Apple EarPods (wired) can serve as a surprising starting point for testing your voice and recording workflow, though they lack the fidelity of a dedicated broadcast mic.
When to upgrade to XLR
XLR microphones require an audio interface to connect to your computer. They are generally more durable and can capture a wider dynamic range, but they add cost and complexity to your podcast setup. You should only choose XLR if you plan to add multiple microphones, want maximum control over your sound, or are building a permanent studio. For most new podcasters, starting with USB is the smarter move.


As an Amazon Associate, we may earn from qualifying purchases.
Choose an audio interface or mixer
An audio interface is the central hub of a professional podcast setup. It converts analog signals from XLR microphones into digital data your computer can record. If you are using USB microphones, you likely do not need one, but an interface gives you better sound quality, lower latency, and the ability to connect multiple hosts simultaneously.
The number of inputs you need depends on your cast size. A two-person podcast requires at least two mic preamps, while a panel show needs more. Look for phantom power (+48V), which is essential for powering most studio-grade condenser microphones. Many modern interfaces also include direct monitoring knobs, allowing you to hear yourself without the slight delay that comes from computer processing.
Here is how the top options compare for typical podcasting needs:
| Model | Inputs | Phantom Power | Best For |
|---|---|---|---|
| Focusrite Scarlett 2i2 | 2 XLR/TRS | Yes | Solo or 2-host interviews |
| Behringer U-Phoria UM2 | 1 XLR/TRS | Yes | Budget solo recording |
| Rode PodCast Interface | 2 XLR | Yes | Podcasters wanting built-in DSP |
| Yamaha AG03 MK2 | 2 XLR/USB | Yes | Streamers and hybrid creators |
Choose closed-back headphones for monitoring
Your podcast setup relies on isolation just as much as it relies on your microphone. When you wear open-back headphones, the audio from your speakers bleeds into the mic capsule, creating an echo that ruins the recording. Closed-back headphones seal off the ear cups, keeping the playback sound contained so it never reaches the microphone. This simple physical barrier is the most effective way to prevent audio bleed.
Wired connections are the standard for a reason. Wireless headphones introduce latency, meaning you hear your voice a fraction of a second later. In a live recording or a video podcast, this delay forces you to talk over yourself, making editing difficult. A wired connection ensures zero lag and eliminates the risk of battery failure mid-episode. Stick to a reliable cable to keep your podcast setup stable.
Start with a durable, budget-friendly option that offers solid isolation. The Sony MDR-7506 is a studio staple used in professional environments because it blocks out external noise effectively. Its lightweight design allows for long recording sessions without fatigue. For those on a tighter budget, the Audio-Technica ATH-M20x provides comparable closed-back isolation at a lower price point, making it a practical choice for beginners building their first podcast setup.


As an Amazon Associate, we may earn from qualifying purchases.
Integrate AI audio tools for editing
The biggest bottleneck in a home podcast setup isn't recording quality; it's the time spent cleaning up audio. In 2026, AI-driven editing tools have shifted from novelty to necessity, allowing creators to strip away noise and transcribe episodes with minimal manual effort. This automation turns hours of tedious post-production into a quick review process, keeping your podcast setup budget-conscious by prioritizing software efficiency over expensive studio time.
Noise removal is the most immediate time-saver. Traditional editing requires isolating background hums, air conditioning rattle, or keyboard clicks by hand. Modern AI plugins analyze your audio track in real-time, identifying and subtracting non-speech frequencies while preserving the natural tone of your voice. Tools like Adobe Podcast Enhance or the noise gates built into Descript act as a digital filter, ensuring your podcast setup sounds professional even in untreated rooms.
Transcription and text-based editing further compress your workflow. Instead of listening to an entire episode to find a mistake, you edit the text transcript. Deleting a sentence in the document automatically removes that audio segment from the timeline. This feature is particularly valuable for solo creators who need to produce content quickly without hiring an editor. It effectively doubles your output capacity for the same amount of post-production time.
Note: AI tools can cut post-production time by half for beginners, but always listen to the final export to ensure the AI hasn't clipped important nuances or words.
Start by testing one AI tool within your existing digital audio workstation or standalone editor. Focus on features that handle the bulk of the labor: noise reduction and transcription. Once you have a reliable AI-assisted workflow, your podcast setup becomes less about expensive hardware and more about smart, automated processes.
Finalize your home recording studio setup
You have the microphone, interface, and AI tools ready. Now comes the physical infrastructure that keeps your audio clean and your workflow smooth. A podcast setup isn't just about what records; it's about what stabilizes the recording environment.
Secure the mic with a sturdy stand
A cheap boom arm will sag under the weight of a dynamic mic, ruining your framing and introducing noise. Choose a heavy-duty scissor-arm stand like the Elgato Wave Mic Arm LP or a standard desktop tripod if space is tight. The goal is zero movement when you gesture or lean in.
Block plosives with a pop filter
Even with a shock mount, plosive sounds (the "p" and "b" pops) can overload your microphone. A dual-layer nylon pop filter, such as the Klark Teknik Pop Filter, sits between your mouth and the capsule to disperse air pressure. It’s a $15 accessory that saves hours of editing noise.
Treat the room, not just the gear
Your interface cleans the signal, but your room shapes the tone. Hard surfaces create echoes that no AI tool can fully remove. Start with affordable acoustic panels like the GIK Acoustics 242 or heavy moving blankets draped behind you. This turns a reflective box into a controlled recording space.
Complete the circuit with headphones
You need closed-back headphones to monitor your audio without bleed. Open-back cans leak sound into the mic. The Audio-Technica ATH-M50x is the industry standard for a reason: durable, flat response, and comfortable for long sessions.
Common Questions About Starting a Podcast Setup
Starting a podcast setup doesn't require a professional studio or a six-figure budget. Most beginners assume they need expensive audio interfaces and XLR microphones right away, but a simple USB microphone like the Samson Q2U is often enough to get started. You can record high-quality audio for under $200 by focusing on the essentials: a decent mic, wired headphones, and free recording software.
What is the best setup for a podcast?
The best podcast setup balances audio quality with ease of use. For solo hosts, a USB dynamic microphone like the Samson Q2U or Shure MV7 eliminates the need for an audio interface. If you have multiple guests, a small interface like the Focusrite Scarlett 2i2 paired with XLR mics is the standard choice. Consistency matters more than gear; pick a setup that you can use regularly without technical friction.
What do I need to set up a podcast?
You only need three core components to begin: a microphone, headphones, and recording software. Wired headphones are preferable to wireless ones to avoid latency issues that make editing difficult. A simple pop filter helps reduce plosive sounds, and a quiet room with soft furnishings acts as natural soundproofing. Start with these basics before investing in acoustic treatment or advanced mixing tools.
How much does a full podcast setup cost?
A functional podcast setup can cost anywhere from $50 to $500. Budget options rely on USB microphones and free software like Audacity or GarageBand, keeping total costs under $100. Mid-range setups involving an audio interface and dedicated XLR mics typically range from $200 to $400. Professional-grade setups with multiple microphones, interfaces, and acoustic treatment can exceed $1,000, but this is unnecessary for most new creators.
What is the basic setup for a podcast?
The basic podcast setup consists of a single microphone, a pair of closed-back headphones, and a computer with recording software. Place the microphone on a boom arm to reduce desk vibrations. Ensure your recording environment is quiet and free from echo by recording in a small room with carpets or curtains. This minimal configuration allows you to publish your first episode immediately without waiting for complex equipment to arrive.
No comments yet. Be the first to share your thoughts!