The 2026 gear baseline

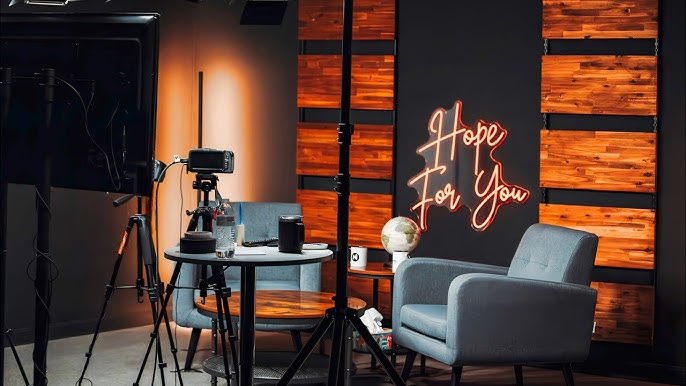
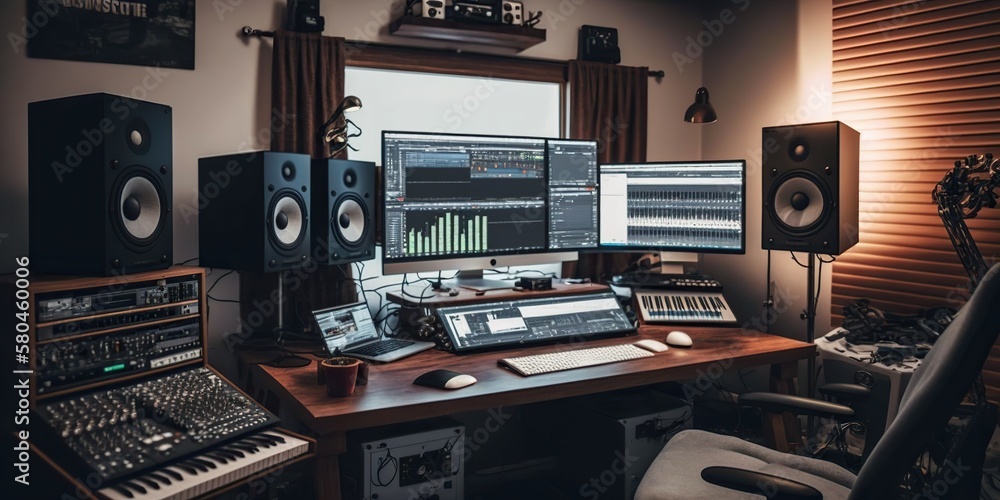
You don't need a Hollywood budget for a podcast in 2026, but your phone's built-in mic isn't enough anymore. Audiences are used to high-end YouTube production values now. If your video looks grainy or your audio echoes, people will click away in seconds. You need a dedicated space where you can control the light and sound.

Audio is actually more important than the camera. I've found that viewers will tolerate a 1080p webcam if the voice is crisp, but they'll leave a 4K stream immediately if there is background hiss. This setup is for solo creators or two-person interviews. If you're trying to film a five-person panel, you'll need different gear than what I'm listing here.

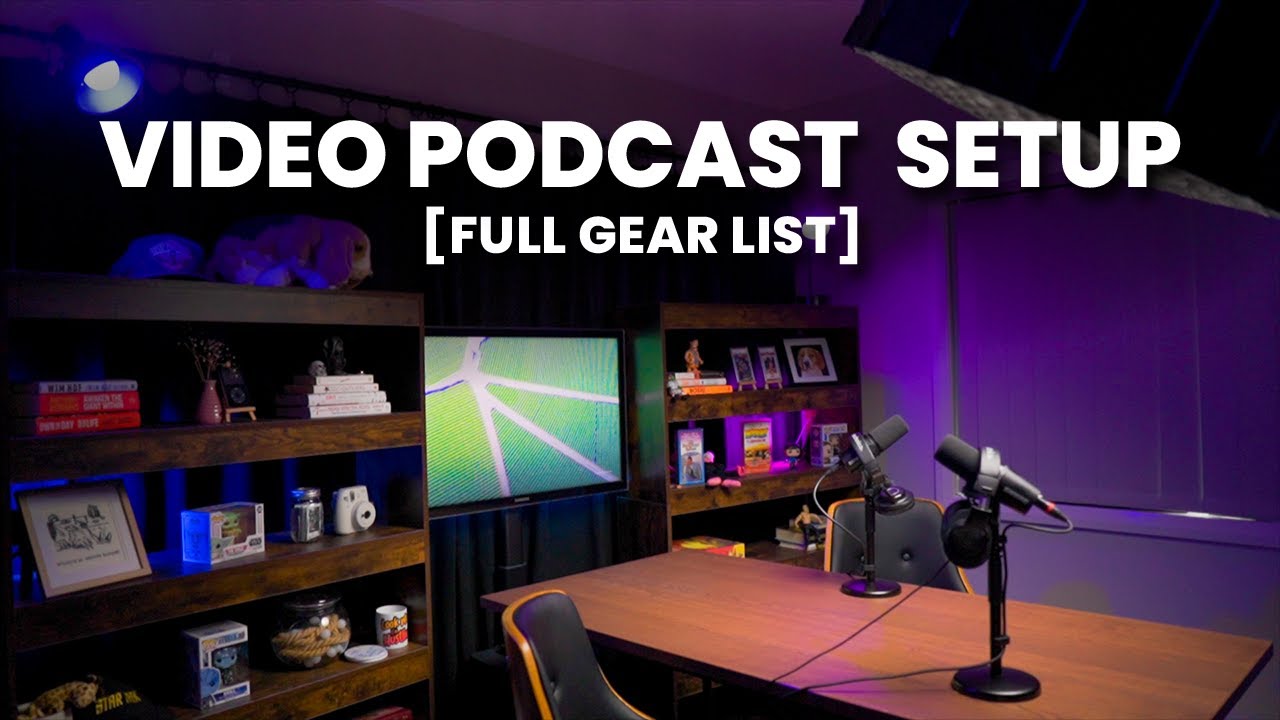
A solid baseline setup includes a dedicated camera

good lighting

a quality microphone

and a reliable internet connection. Don

t skimp on any of these areas. Think of it as an investment in your brand. The goal isn

t to replicate a network television broadcast

but to present a professional

engaging experience that keeps viewers coming back for more.

Home video podcast studio setup: lighting, camera & equipment

Webcam vs. Mirrorless/DSLR for Video Podcasting (2026)

FeatureWebcam (Logitech Brio 4K)Webcam (Razer Kiyo Pro)Mirrorless (Sony Alpha 6400)Mirrorless (Panasonic Lumix GH6)
PriceGenerally LowerMid-RangeHigherHigher
Image QualityGood, optimized for video callsVery Good, improved low-light sensorExcellent, shallow depth of field possibleProfessional quality, cinematic options
Low Light PerformanceAcceptable with light correctionBetter than standard webcamsSignificantly Better, requires fast lensExcellent, full-frame options available
Ease of UsePlug and PlaySimple SetupRequires more configurationSteeper learning curve
Streaming CapabilityNative support with most platformsNative support with most platformsRequires capture card for direct streamingRequires capture card for direct streaming
PortabilityHighly PortableHighly PortablePortable, but requires accessoriesPortable, but requires more accessories
Audio QualityBuilt-in microphone – BasicBuilt-in microphone – ImprovedNo built-in audio, external mic recommendedNo built-in audio, external mic recommended
ControlLimited adjustmentsSome software controlFull manual controlExtensive manual control

Qualitative comparison based on the article research brief. Confirm current product details in the official docs before making implementation choices.

Starting a Video Podcast in 2026: Complete Home Studio Lighting and Camera Setup Guide

1
Step 1: Understanding the Importance of Lighting

Good lighting is arguably the most crucial element of a successful video podcast. It dramatically impacts the perceived quality of your production, even more so than camera resolution in many cases. Proper lighting makes you look professional, approachable, and ensures viewers can clearly see you. Poor lighting can cause distractions, eye strain, and a generally unprofessional appearance. We'll focus on a three-point lighting setup, a standard in video production, as a solid foundation.

2
Step 2: Introducing the Three-Point Lighting Setup

The three-point lighting setup utilizes three lights to illuminate your face and create depth. These are the Key Light, Fill Light, and Back Light (also known as a Hair Light). The Key Light is your primary light source, providing the most illumination. The Fill Light softens shadows created by the Key Light. The Back Light separates you from the background, adding dimension and preventing you from looking flat.

3
Step 3: Setting Up Your Key Light

Position your Key Light at approximately a 45-degree angle to your face. It should be slightly above eye level, pointing downwards. This creates natural-looking shadows and highlights. Experiment with the distance to adjust the intensity – closer for brighter light, further for softer light. Softboxes or diffusers are highly recommended for Key Lights to avoid harsh shadows. LED panels are a popular choice due to their cool operation and adjustable brightness.

4
Step 4: Adding the Fill Light

Place your Fill Light on the opposite side of your face from the Key Light. It should be at a lower intensity than the Key Light – roughly half the brightness. The Fill Light’s purpose is to fill in the shadows created by the Key Light, creating a more balanced look. You can achieve this by using a less powerful light, moving the light further away, or using a diffuser. The goal is to soften shadows, not eliminate them entirely.

5
Step 5: Implementing the Back Light

Position the Back Light behind you, aimed at the back of your head and shoulders. This light creates separation between you and the background, preventing you from blending in. It adds a subtle halo effect, making you appear more three-dimensional. Be careful not to point the Back Light directly at the camera lens, as this can cause flare. Adjust the intensity so it's visible, but not overpowering.

6
Step 6: Camera Settings and Positioning

Once your lighting is set, focus on your camera. Position it at eye level for a natural look. Ensure your background is clean and uncluttered. Most modern webcams or smartphone cameras are sufficient for starting out, but consider an external webcam for improved image quality. Pay attention to your framing – leave some headroom above your head and avoid cutting off parts of your face.

7
Step 7: Testing and Adjusting

Record a short test clip and review it critically. Pay attention to shadows, highlights, and overall balance. Adjust the position and intensity of each light until you achieve a look you’re happy with. Don't be afraid to experiment! Small adjustments can make a big difference. Consider how the lighting looks with your chosen background.

Video Podcast Studio Setup: Lighting & Camera Checklist

  • Camera Selection: Choose a camera capable of at least 1080p resolution. Consider a webcam, mirrorless camera, or DSLR based on budget and desired image quality.
  • Lighting Plan: Determine your lighting style (e.g., three-point lighting) and the number of lights needed to evenly illuminate your recording space.
  • Key Light Setup: Position your key light slightly to the side of the camera, providing the primary illumination for your face.
  • Fill Light Implementation: Add a fill light on the opposite side of the key light to soften shadows and create a more balanced look.
  • Backlight (Hair Light) Placement: If desired, incorporate a backlight to separate you from the background and add depth.
  • Background Check: Ensure your background is visually appealing and free of distractions. Consider a neutral backdrop or a tidy room.
  • Camera Settings: Configure your camera settings (white balance, exposure, focus) for optimal video quality in your recording environment.
Your video podcast studio lighting and camera setup is complete! Test your setup thoroughly before recording your first episode.
Video podcast studio setups: backgrounds, lighting & camera options for 2026

Video Podcasting Setup: FAQs

Quick Reference

  • Guitar Center Used Gear - Regularly offers discounted lighting, cameras, and audio interfaces. Inventory varies greatly, so frequent checks are recommended.
  • B&H Photo Video Open Box - A reliable source for professional-grade equipment with potential savings on returned or slightly used items. Offers a comprehensive selection.
  • r/PodcastGear subreddit - A community forum where users buy, sell, and trade podcasting and video equipment. Offers potential deals and valuable advice.
  • Facebook Marketplace - A local option for finding used equipment, often at lower prices. Requires careful inspection and testing before purchase.
  • Sweetwater’s Clearance Section - Sweetwater frequently updates its clearance section with discounts on lighting, cameras, and related accessories. Known for excellent customer service.
  • Adorama Used Department - Similar to B&H, Adorama offers a used department with inspected and discounted equipment, including cameras and lighting solutions.
  • eBay (Completed Listings) - Searching completed listings on eBay can give you a realistic idea of current market prices for specific equipment. Use with caution and verify seller reputation.