
Sound quality matters
Let’s be real: nobody wants to listen to a podcast that sounds like it was recorded in a tin can. Bad audio is a quick way to lose listeners, even if your content is amazing. People are surprisingly forgiving of less-than-perfect production, but truly bad sound quality is a non-starter.
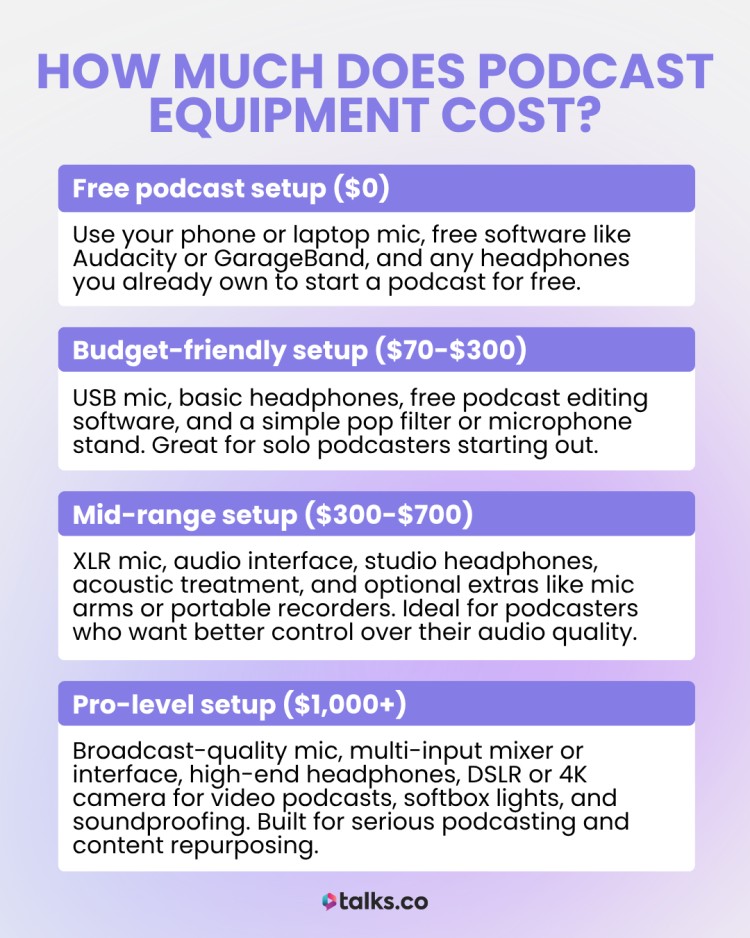
But starting a podcast doesn’t require a professional studio, or a fortune in equipment. In 2026, you can build a surprisingly capable setup for under $500. We’re aiming for clear, understandable audio that sounds polished without the professional price tag.
I want to be upfront: this guide isn’t about achieving studio-perfect sound. It's about getting started, sounding good enough to build an audience, and learning as you go. We’ll focus on practical choices, reliable equipment, and minimizing frustration. Forget chasing the latest trends; we’re building a solid foundation.

Choosing a microphone
The microphone is the most important piece of your podcast setup. It’s what captures your voice, so investing in a decent one is critical. Generally, you’ll encounter two main types: USB and XLR. USB microphones are simpler – they plug directly into your computer. XLR mics require an audio interface (more on that later), but offer greater flexibility and potentially better sound quality.
For a budget-friendly setup, we’ll focus on USB microphones. They’re convenient, affordable, and deliver excellent results for most podcasters. One thing to consider is the difference between dynamic and condenser mics. Dynamic mics are better at rejecting background noise, making them ideal for less-than-ideal recording environments. Condenser mics are more sensitive and capture more detail, but require a quieter space.
Here are a few USB microphone recommendations, all under $150:
The Blue Yeti ($130) is a classic for a reason. It’s versatile, with multiple polar patterns (cardioid, stereo, omnidirectional, bidirectional) and a built-in headphone jack. It's a solid all-around choice, but can pick up a lot of room noise.
The Rode NT-USB Mini ($99) is a streamlined option that delivers excellent audio quality in a compact package. It’s incredibly easy to use and sounds great right out of the box. It’s a good choice if you want simplicity.
The Samson Q2U ($60) is a dynamic microphone that’s perfect for noisy environments. It includes a mic clip, tripod stand, USB cable, and XLR cable, making it a complete package. It's a fantastic value for the price.
While USB mics are a great starting point, remember that XLR microphones offer more control and potential for improvement down the line. But for under $500, a good USB mic is perfectly sufficient.
Featured Products

Plug and Play USB connectivity · Four pickup patterns for versatile recording · Blue VO!CE effects for enhanced vocal quality
This versatile USB microphone offers excellent audio quality and ease of use, making it perfect for aspiring podcasters looking to upgrade their sound without breaking the bank.

Studio-quality condenser sound · USB connectivity for plug-and-play simplicity · Includes free RODE Connect software
This versatile USB microphone offers excellent audio quality and ease of use, making it perfect for aspiring podcasters looking to upgrade their sound without breaking the bank.
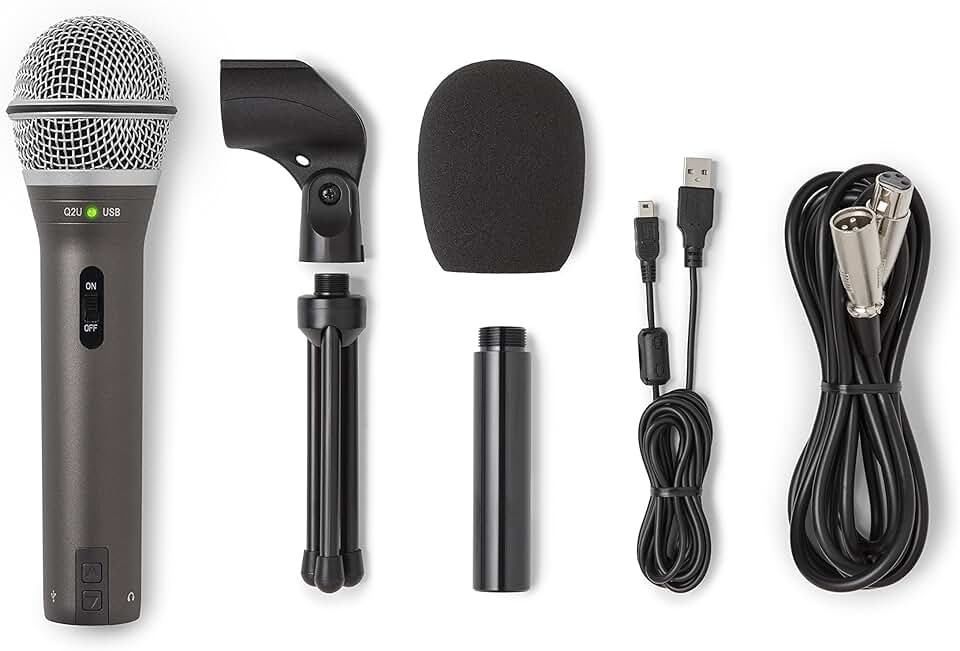
Dual USB and XLR connectivity for flexibility · Dynamic microphone capsule for clear voice capture · Includes essential accessories like a mic clip and stand
This versatile USB microphone offers excellent audio quality and ease of use, making it perfect for aspiring podcasters looking to upgrade their sound without breaking the bank.

Cardioid condenser element for detailed sound · Direct USB connection for easy setup · Built-in headphone jack with volume control for zero-latency monitoring
This versatile USB microphone offers excellent audio quality and ease of use, making it perfect for aspiring podcasters looking to upgrade their sound without breaking the bank.
As an Amazon Associate I earn from qualifying purchases. Prices may vary.
Headphones: Hear Yourself Clearly
Headphones aren’t just for listening to your podcast after you’ve recorded it. They’re essential for monitoring your audio while you’re recording. This allows you to hear exactly what your audience is hearing, catch any mistakes, and prevent feedback loops.
When choosing headphones for podcasting, you’ll want to consider open-back versus closed-back designs. Open-back headphones offer a wider soundstage and more natural sound, but they leak audio, meaning sound can escape and be picked up by your microphone. Closed-back headphones are the better choice for podcasting because they isolate sound, preventing feedback and ensuring a clean recording.
Here are a couple of reliable closed-back headphones under $75:
The Audio-Technica ATH-M20x ($49) are industry staples, known for their clear sound and comfortable fit. They’re a great all-around option for podcasting and general audio monitoring.
The Sony MDR-7506 ($69) are another popular choice, renowned for their accuracy and durability. They’re a bit more expensive than the ATH-M20x, but they’re a solid investment if you plan to do a lot of audio work.
Comfort is key – you’ll be wearing these for extended periods. Don’t break the bank on audiophile-grade sound; clarity and a comfortable fit are far more important for podcasting.

Audio-Technica ATH-M20x Professional Studio Monitor Headphones, Black
- Professional sound quality for accurate audio monitoring
- Comfortable design for extended listening sessions
- Durable construction for reliable use
The Audio-Technica ATH-M20x headphones provide clear, detailed sound crucial for catching every nuance of your audio during recording and editing, making them an essential and affordable component of any beginner podcasting setup.
View on Amazon →As an Amazon Associate I earn from qualifying purchases.
Audio Interface & XLR Options (If You Upgrade)
If you decide to upgrade to an XLR microphone down the road, you’ll need an audio interface. An audio interface converts the analog signal from your microphone into a digital signal that your computer can understand. It also provides phantom power for condenser microphones and allows you to connect headphones.
The Focusrite Scarlett Solo ($119) is a popular entry-level audio interface. It’s simple to use, delivers excellent sound quality, and is compatible with both Mac and Windows. It adds complexity to your setup, but unlocks the potential for better audio quality from an XLR microphone.
I want to reiterate: this isn’t essential for a $500 budget. A good USB microphone is a perfectly fine starting point. Consider an audio interface as a future upgrade, once you’ve gained some experience and are ready to invest in higher-end equipment.
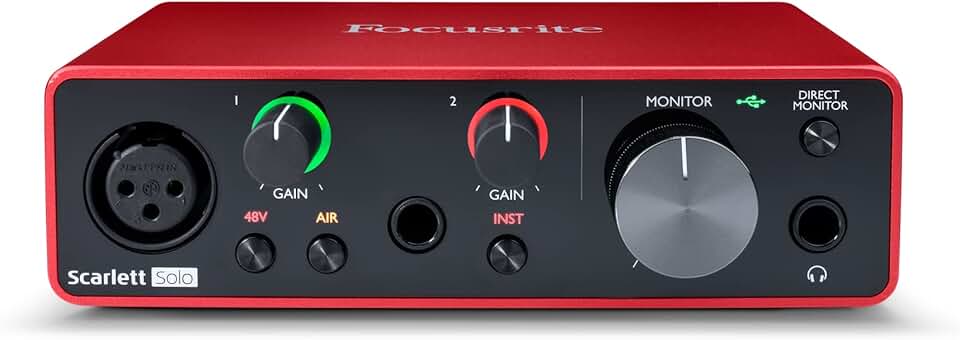
Focusrite Scarlett Solo 3rd Gen USB Audio Interface for Guitarists, Vocalists, Podcasters or Producers to record and playback studio quality sound
- High-quality preamps for clear vocal and instrument recording
- Direct monitoring for zero-latency playback
- USB connectivity for easy setup with Mac or PC
The Focusrite Scarlett Solo (3rd Gen) is a fantastic entry-level audio interface that delivers studio-quality sound, making it an ideal choice for podcasters looking to elevate their audio without breaking the bank.
View on Amazon →As an Amazon Associate I earn from qualifying purchases.
Recording & Editing Software: Free is Fantastic
You don’t need to spend a fortune on recording and editing software. There are several excellent free options available. Audacity is the go-to choice for many podcasters. It’s a powerful, open-source audio editor that’s available for Mac, Windows, and Linux.
GarageBand (free with macOS) is another excellent option, particularly for Mac users. It’s user-friendly and offers a wide range of features. If you're willing to pay a monthly fee, Descript ($12/month and up) is a transcription-based editor that simplifies the editing process.
The basics you’ll need to learn are recording, editing out mistakes, adding intro/outro music, and noise reduction. Audacity has a wealth of tutorials available online. Here’s a good starting point:
Don’t get bogged down in advanced features at first. Focus on mastering the fundamentals. You can always learn more as you go.
Acoustic Treatment: Making Your Space Sound Better
Acoustic treatment is about minimizing echo and reverb in your recording space. Even a small improvement can make a big difference in the clarity of your audio. You don’t need a professional acoustic studio – simple DIY solutions can go a long way.
Start by recording in a small, carpeted room. Soft surfaces absorb sound, reducing reflections. Blankets and pillows can also help. Acoustic foam panels are effective, but can be expensive. Consider strategically placing them on walls and ceilings.
The difference between absorption and diffusion is important. Absorption reduces the overall sound level, while diffusion scatters sound waves, preventing harsh reflections. A combination of both is ideal, but absorption is more important for a budget setup.
Even hanging thick curtains can help to deaden the sound in a room. Some treatment is always better than none, and you’ll be surprised at the improvement even simple changes can make.
Essential Accessories: Cables, Stands & More
Don’t forget the often-overlooked accessories! A microphone stand is essential. A boom arm is ideal, as it allows you to position the microphone precisely, but a simple desk stand will also work.
A pop filter is crucial for reducing plosives – those harsh “p” and “b” sounds that can ruin a recording. An XLR cable is needed if you’re using an XLR microphone. A headphones adapter may be necessary if your headphones don’t have the correct connector.
A shock mount is optional, but it can help to reduce vibrations that can be picked up by your microphone. Amazon is a good source for affordable accessories. Here are a few options:
Microphone Windscreen Pop Filter ($10)
Adjustable Microphone Suspension Boom Scissor Arm Stand ($25)
USB Microphone Stand ($15)
This is where costs can quickly add up, so prioritize. A good microphone stand and pop filter are the most important accessories.
Essential Podcast Accessories Under $500: Elevate Your Audio Quality

Adjustable boom arm for optimal microphone positioning · Includes 3/8” to 5/8” adapter for broad compatibility · Supports microphones up to 1.5kg and includes cable ties
This versatile microphone arm stand allows for precise mic placement, reducing background noise and improving audio quality for a cleaner podcast sound.
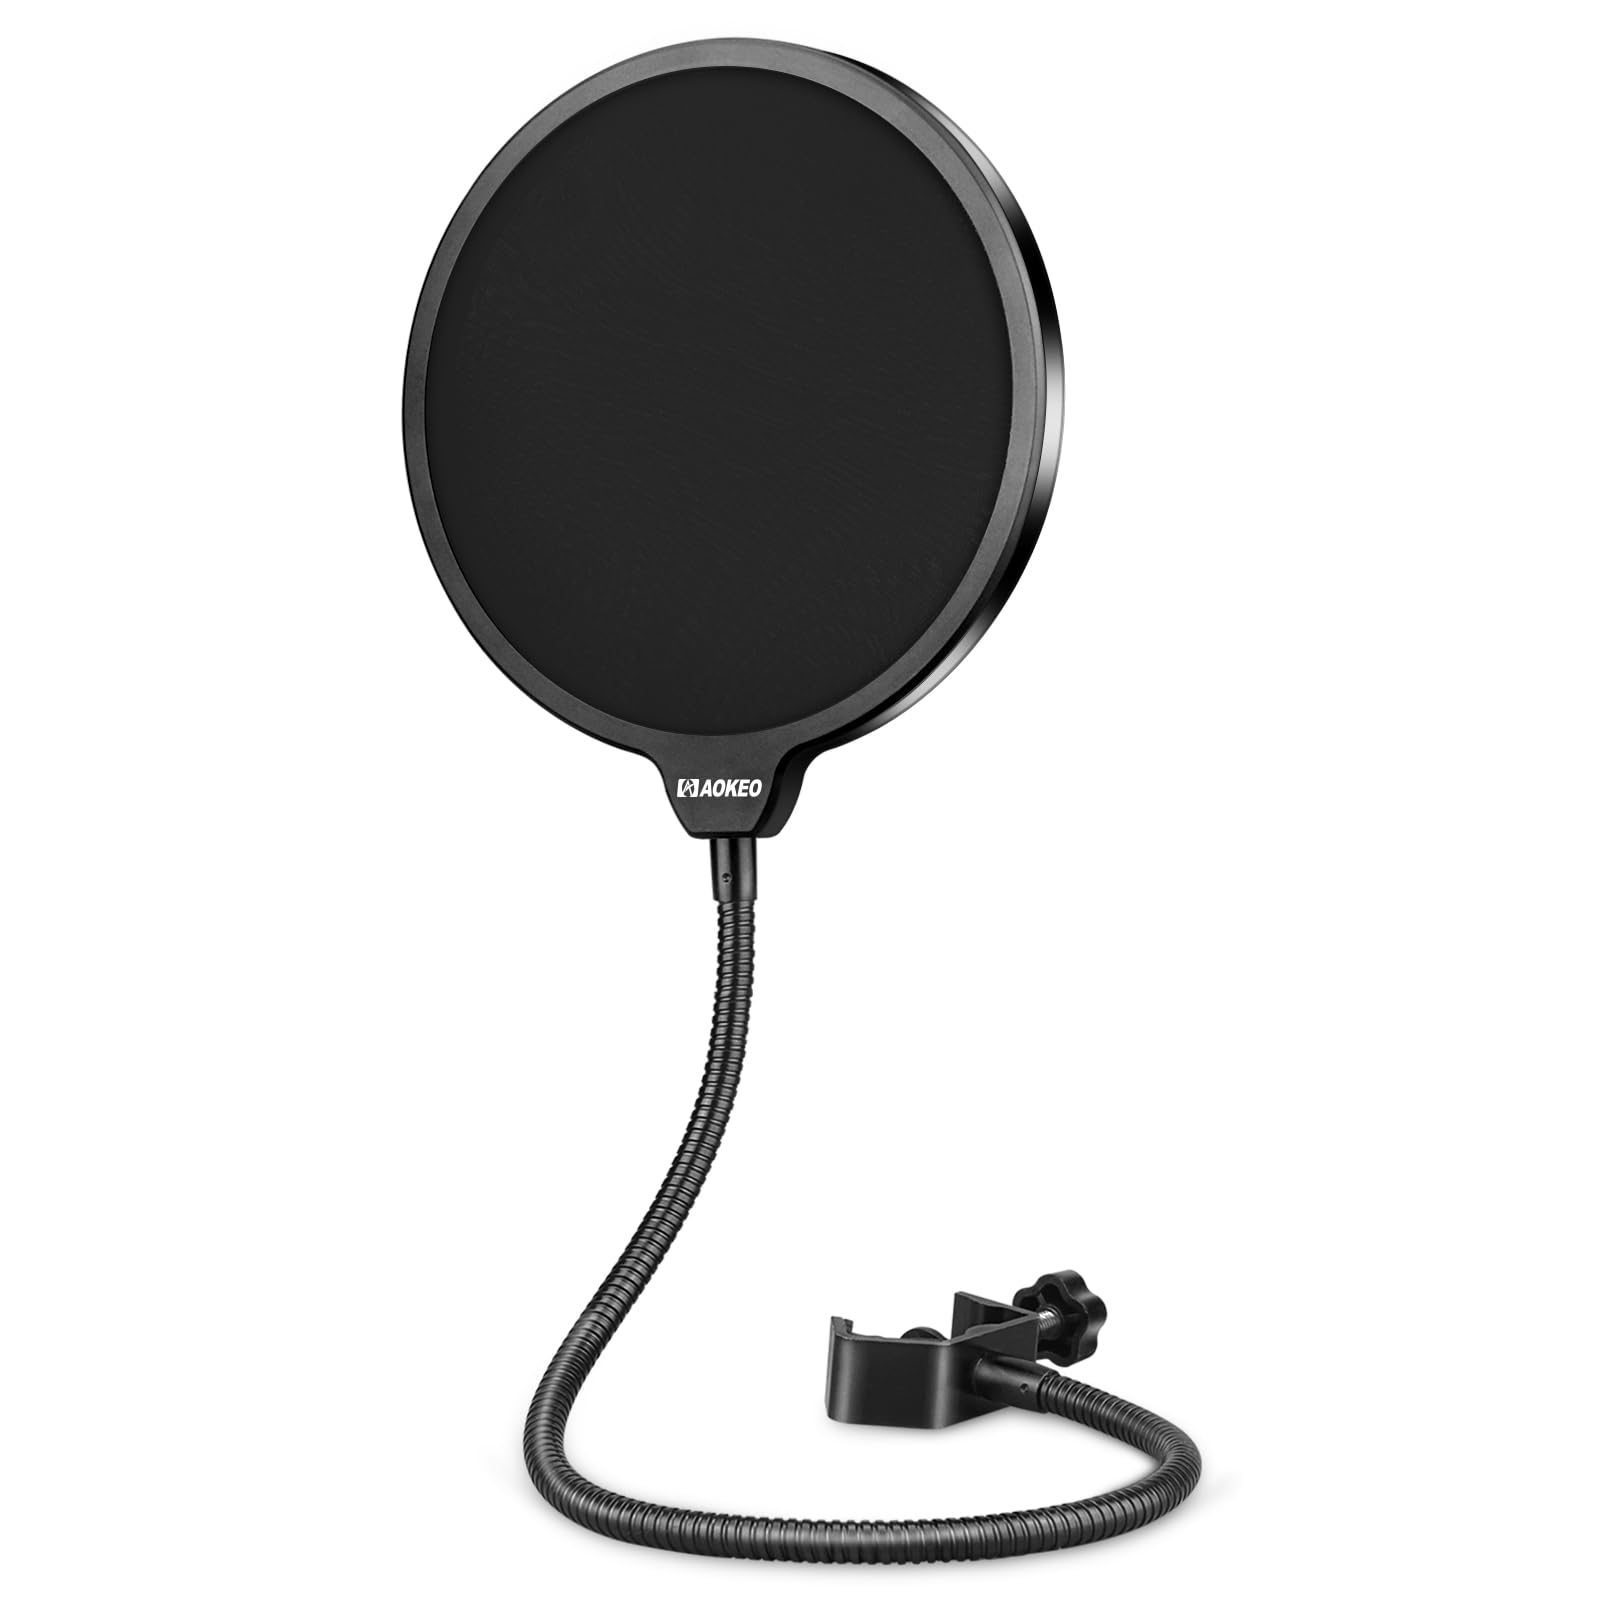
Effectively reduces plosive sounds ('p' and 'b' sounds) · Protects microphone from moisture and dust · Attaches easily to most microphone stands
A pop filter is essential for eliminating harsh popping sounds caused by spoken plosives, ensuring a smooth and professional vocal recording.
10-foot length provides ample reach · All-copper conductors for clear signal transmission · Low-noise design minimizes interference
This XLR cable ensures a reliable and clean connection between your microphone and audio interface, crucial for capturing high-quality audio without interference.
Designed for accurate sound reproduction · Comfortable earcups for extended listening sessions · Durable construction for studio use
These studio monitor headphones offer a flat, accurate frequency response, allowing you to hear your audio precisely as it is, essential for mixing and editing.
As an Amazon Associate I earn from qualifying purchases. Prices may vary.
Budget Breakdown: Staying Under $500
Let’s recap the costs and see if we can stay under $500. Here’s a sample budget breakdown:
Microphone (Blue Yeti): $130
Headphones (Audio-Technica ATH-M20x): $49
Microphone Stand & Pop Filter: $40
Accessories (Cables, Adapter): $20
Software: Free (Audacity)
This totals $239, leaving you with plenty of room for a basic audio interface like the Focusrite Scarlett Solo ($119) if you want to get a head start on XLR equipment.
Remember, these are just estimates. Prices can vary depending on where you shop and any sales or discounts you can find. Websites like Amazon and Sweetwater often have deals on podcasting equipment. The key is to be resourceful and prioritize your needs.
Sample Podcast Setup Budget (Under $500)
| Item | Estimated Cost |
|---|---|
| Microphone | $80 - $150 |
| Headphones | $50 - $100 |
| Software (Recording/Editing) | Free - $100 (Many free options available, paid options offer more features) |
| Accessories (Cables, Pop Filter, Mic Stand) | $30 - $70 |
| Audio Interface (Optional) | $100 - $150 (Needed for XLR microphones, can be skipped with USB mics) |
| Total | $260 - $570 |
Illustrative comparison based on the article research brief. Verify current pricing, limits, and product details in the official docs before relying on it.
No comments yet. Be the first to share your thoughts!