

Start with the right microphone
The microphone is the single most important piece of gear in your home recording studio. It captures the raw source, and no amount of software magic can fix a poor recording. Before you spend on interfaces or monitors, choose a mic that fits your primary use case and the acoustic reality of your room.
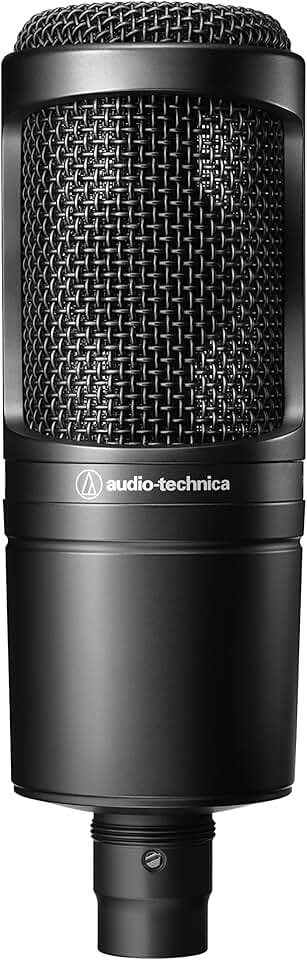
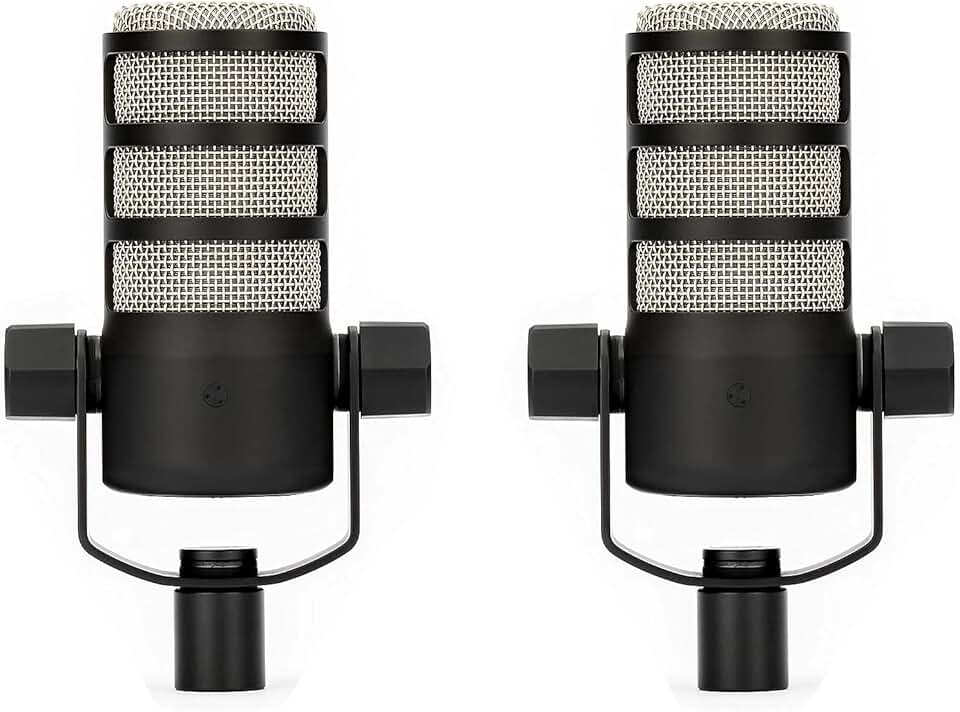
If you are recording voiceovers, podcasts, or vocals in a treated space, a large-diaphragm condenser microphone will give you that polished, professional sound. These mics are sensitive and capture detail, but they also pick up room noise. If you are in an untreated bedroom or recording loud instruments like drums or electric guitar amps, a dynamic microphone is the better choice. It rejects background noise and handles high sound pressure levels without distortion.
Here are three reliable options that cover the most common home studio needs:

As an Amazon Associate, we may earn from qualifying purchases.
When you start building your home recording studio, remember that the microphone is your first line of defense against bad audio. Pick the one that matches your environment, not just your budget.
Choose an audio interface
An audio interface is the bridge between your analog world and your digital audio workstation. Without it, you cannot connect XLR microphones, line-level instruments, or monitor speakers to your computer. It houses the analog-to-digital converters that determine sound quality and the preamps that boost weak microphone signals to usable levels. For a home recording studio, this single piece of hardware defines your input fidelity and output clarity.
When selecting an interface, focus on channel count and preamp quality. Start with two inputs if you plan to record vocals or acoustic instruments solo. You will need two inputs to capture a stereo signal from a keyboard or drum overheads. If you record bands or podcasts with multiple people, look for interfaces with four or more inputs. Always prioritize preamp quality over sheer quantity; clean, transparent preamps are more valuable than a cluttered panel of noisy ones.
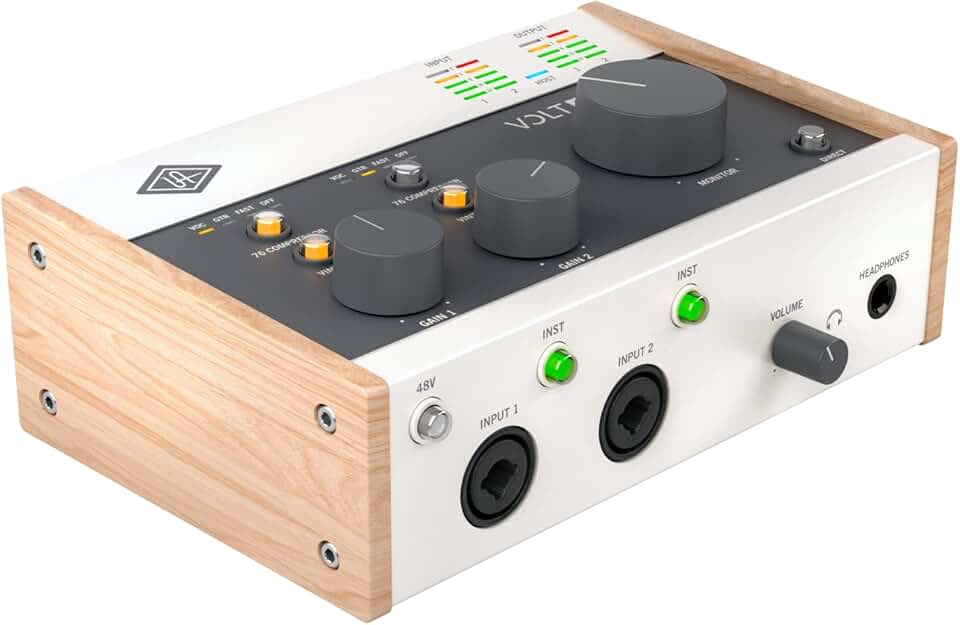
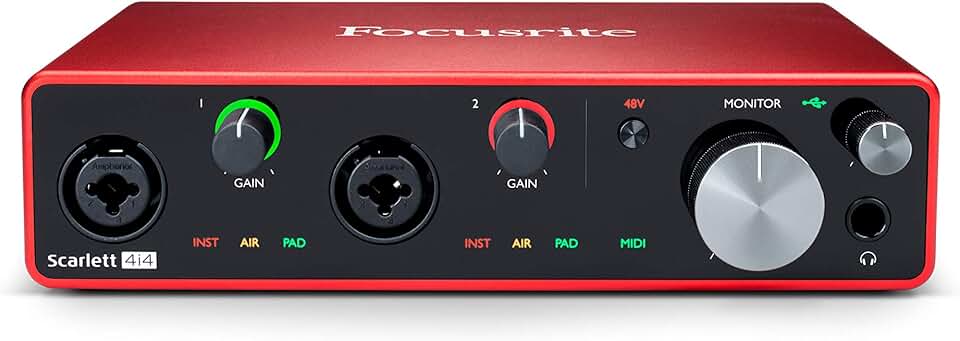
The following table compares key specifications for top-tier interfaces. These models represent the current standard for connectivity, preamp performance, and build quality in the professional home studio market.
| Model | Inputs | Preamp Type | Connectivity |
|---|---|---|---|
| Universal Audio Volt 2 | 2 | Volt | USB-C |
| Focusrite Scarlett 4i4 | 4 | 3rd Gen | USB-C |
| Motu M2 | 2 | Custom | USB-C |
| RME Babyface Pro FS | 2 | Ultra-low noise | USB 3.0 |
| Audient iD14 MKII | 2 | ASP | Thunderbolt 3 |

As an Amazon Associate, we may earn from qualifying purchases.
Closed-back vs. open-back headphones for your home recording studio
Choosing the right monitoring headphones is one of the most critical decisions when building a home recording studio. The difference between closed-back and open-back designs fundamentally changes how you hear your mix, and picking the wrong type can lead to costly mistakes in your final production.
Closed-back headphones seal the ear cups completely, isolating you from external noise. This makes them ideal for recording vocals or instruments in untreated rooms, as they prevent sound leakage into the microphone. However, this isolation can create a "boxed" sound, making it harder to judge spatial depth and reverb. They are the practical workhorse for tracking.
Open-back headphones feature grilles that allow air and sound to pass through, creating a wider, more natural soundstage. This openness helps you hear details and depth more accurately, which is why many engineers prefer them for mixing. The trade-off is that they leak sound, making them unsuitable for recording in the same room, and they offer no isolation from background noise.
For a versatile home recording studio, many producers start with a pair of closed-back cans for tracking and an open-back pair for mixing. If you can only afford one pair, prioritize comfort and a flat frequency response over the back type, as accurate monitoring matters more than the design itself.
Optimize your recording space
You can own the best microphones and interfaces in the world, but if your room sounds like a tile bathroom, your recordings will suffer. Acoustic treatment matters far more than expensive gear. A properly treated room allows even budget equipment to capture clear, professional sound.
Start with the basics of room symmetry. Place your main listening position in the center of the room, equidistant from the side walls, to minimize standing waves. Position your monitors so they form an equilateral triangle with your head. This "sweet spot" ensures accurate stereo imaging and helps you make better mixing decisions.
For low-cost treatment, focus on the first reflection points. These are the spots on your side walls and ceiling where sound bounces directly from your speakers to your ears. DIY acoustic panels filled with rigid fiberglass or mineral wool work well here. You can also use heavy blankets or moving pads in a pinch for a quick fix.
Don't neglect the corners. Bass traps absorb low-frequency energy that builds up in corners, reducing muddiness in your recordings. If you can't afford custom bass traps, store tall bookshelves filled with books in the corners. The irregular surfaces and mass of the books act as natural diffusers and absorbers, smoothing out the room's low-end response.
Finally, manage parallel walls. Hard surfaces opposite each other create flutter echoes. Adding a thick rug, a heavy tapestry, or even a sofa can break up these reflections. The goal isn't to deaden the room completely, but to remove the coloration that distorts your recordings.
Leverage AI audio tools
You no longer need a professional engineer to make a home recording studio sound polished. In 2026, AI-powered plugins handle the tedious technical work, allowing you to focus on performance rather than fiddling with knobs. These tools act as an invisible safety net, catching mistakes before they become permanent.
Modern AI assistants can isolate vocals from a noisy room, remove background hum, and even tune pitch in real-time. This means a bedroom setup can produce broadcast-quality audio. The barrier to entry has dropped significantly, making high-end results accessible to anyone with a decent microphone and the right software.
Frequently asked: what to check next
Setting up a home recording studio is more accessible than ever, but new buyers often worry about space, cost, and workflow. These questions address the most common friction points for building a practical setup at home.
No comments yet. Be the first to share your thoughts!