
Building Your Dream Home Recording Studio: The $500 Challenge
Creating a professional-quality home recording studio doesn't require breaking the bank. With strategic planning and smart equipment choices, you can establish a fully functional recording environment for under $500 in 2024. This comprehensive guide will walk you through every essential component needed to transform any room into your personal creative sanctuary.
Why $500 is the Sweet Spot for Budget Studios
The $500 budget represents the perfect balance between affordability and functionality. At this price point, you can secure genuine professional-grade equipment that will serve you for years, rather than settling for toys that limit your creative potential. Modern technology has democratized music production, making previously expensive studio equipment accessible to bedroom producers and aspiring artists.
Your existing computer likely already meets the basic requirements for audio production. Most computers manufactured within the last five years, equipped with at least 8GB of RAM and a decent processor, can handle multiple audio tracks without breaking a sweat. This means your $500 can focus entirely on the specialized audio equipment that will define your studio's capabilities.
Essential Components Breakdown
Budget Home Recording Studio Equipment Allocation Under $500
| Equipment Category | Recommended Product | Price Range | Budget Percentage | Budget Allocation |
|---|---|---|---|---|
| Audio Interface | Focusrite Scarlett Solo (3rd Gen) | $120-130 | 26% | $130 |
| Microphone | Audio-Technica AT2020 | $99-109 | 22% | $110 |
| Closed-Back Headphones | Sony MDR-7506 | $99-109 | 22% | $110 |
| Studio Monitors | PreSonus Eris E3.5 | $99-109 | 22% | $110 |
| Cables & Accessories | XLR Cable, Pop Filter, Stand | $30-40 | 8% | $40 |
| Total Budget | Complete Home Studio Setup | $447-497 | 100% | $500 |
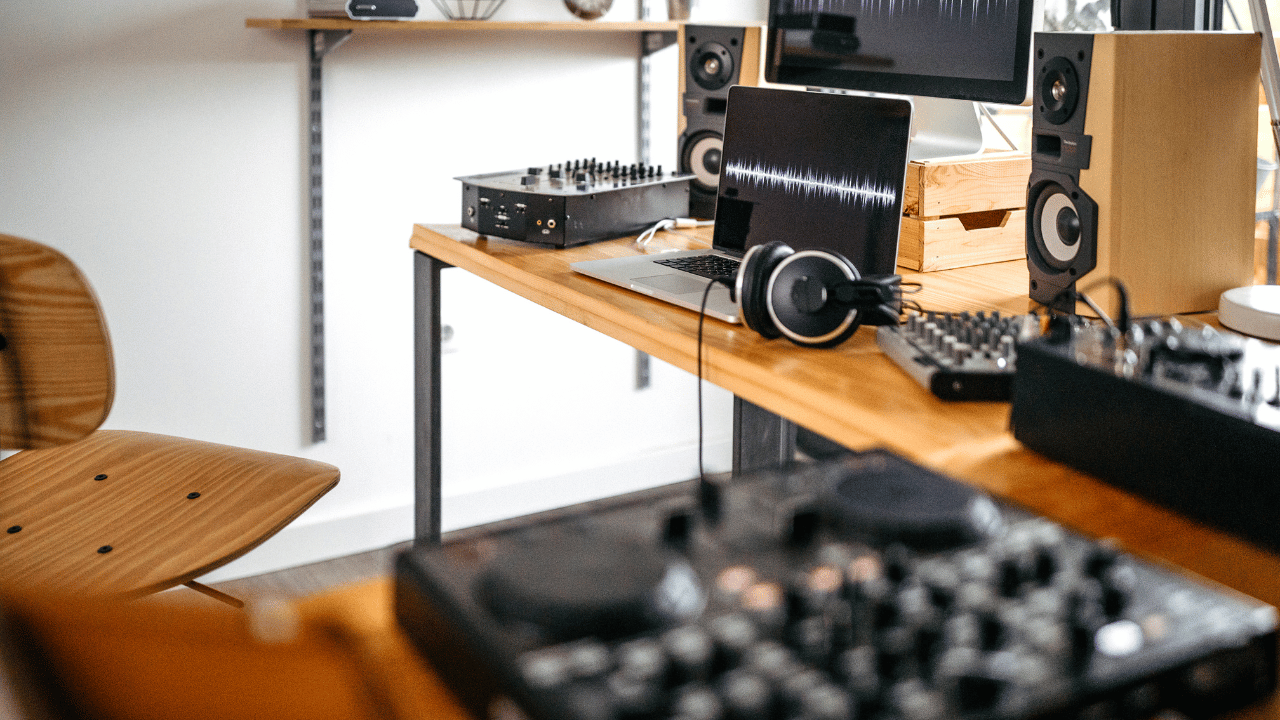
The foundation of any home recording studio rests on five critical components: an audio interface, microphone, headphones, monitor speakers, and recording software. Each serves a specific purpose in the signal chain from your voice or instrument to the final recorded track.
Your audio interface acts as the bridge between the analog world of sound and the digital realm of your computer. It converts analog signals from microphones and instruments into digital data your computer can process, while also providing phantom power for condenser microphones and offering multiple input options for simultaneous recording.
The microphone captures the essence of your performance, whether you're recording vocals, acoustic instruments, or amplified sources. A quality microphone within your budget can rival recordings made in professional studios when paired with proper technique and room treatment.
Smart Shopping Strategies for Maximum Value
Timing your purchases strategically can stretch your budget significantly further. Black Friday, end-of-year clearances, and back-to-school promotions often feature substantial discounts on audio equipment. Additionally, considering previous-generation models from reputable manufacturers can provide professional features at budget-friendly prices.
Best Budget Home Recording Studio Equipment Under $500 (2024 Pricing)
| Equipment Category | Recommended Model | Best Price/Retailer | Key Features | Budget Allocation |
|---|---|---|---|---|
| Audio Interface | Focusrite Scarlett Solo 3rd Gen | $130 / Amazon | 1 XLR/Instrument input, USB-C, 24-bit/192kHz | $130 (26%) |
| Studio Microphone | Audio-Technica AT2020 | $99 / B&H Photo | Cardioid condenser, side-address, low self-noise | $99 (20%) |
| Studio Headphones | Sony MDR-7506 | $85 / Sweetwater | Closed-back, flat response, industry standard | $85 (17%) |
| Studio Monitors | PreSonus Eris E3.5 | $99 / Guitar Center | 3.5-inch woofers, acoustic tuning controls | $99 (20%) |
| Microphone Stand | InnoGear Boom Arm | $25 / Amazon | Adjustable boom arm with pop filter included | $25 (5%) |
| Audio Cables | Mogami 2534 XLR Cable | $35 / Sweetwater | 20-foot professional XLR cable, quad-star design | $35 (7%) |
| Pop Filter | Aokeo Professional Pop Filter | $15 / Amazon | Double mesh screen, flexible gooseneck | $15 (3%) |
| Acoustic Treatment | Primacoustic VoxGuard | $12 / B&H Photo | Portable vocal booth, reduces room reflections | $12 (2%) |
Refurbished equipment from authorized dealers offers another avenue for premium gear at reduced costs. Many manufacturers offer certified refurbished products with full warranties, providing peace of mind alongside savings. Online marketplaces also present opportunities for gently used professional equipment, though careful research and seller verification remain essential.
Room Considerations and Acoustic Treatment
Your recording environment plays a crucial role in the final quality of your productions. While professional acoustic treatment can cost thousands, simple DIY solutions using household items can dramatically improve your recordings without impacting your equipment budget.
Closets filled with clothes naturally absorb reflections and provide excellent vocal recording environments. Alternatively, hanging blankets or towels around your recording area creates a controlled acoustic space. The key lies in minimizing hard, reflective surfaces that can cause unwanted echoes and room coloration.
Software Solutions That Won't Break the Bank
Digital Audio Workstations have evolved tremendously, with several excellent options available at no cost. Reaper offers professional features with a generous trial period and an affordable $60 license for non-commercial use. Mac users benefit from GarageBand's inclusion with their system, while Windows users can explore Cakewalk by BandLab, a completely free professional DAW.
These software solutions include virtual instruments, effects processors, and mixing tools that would have cost thousands just a decade ago. Combined with the vast library of free plugins available online, your software arsenal can rival professional studios without additional investment.
The journey toward building your home recording studio begins with understanding that limitations often spark creativity. Many legendary recordings were captured with minimal equipment, proving that artistic vision trumps expensive gear. Your $500 budget provides everything necessary to begin this exciting journey into music production and audio recording.
Essential Equipment Breakdown: Your $500 Home Recording Studio Shopping List
Now that we've established the foundation, let's dive into the specific equipment you'll need and how to allocate your $500 budget effectively. Each component plays a crucial role in your home studio setup, and understanding the price-to-performance ratio will help you make informed decisions.
Complete Budget Home Recording Studio Equipment Breakdown Under $500
| Equipment Category | Recommended Model | Price Range | Key Specifications | Purpose |
|---|---|---|---|---|
| Audio Interface | Focusrite Scarlett Solo | $120-140 | 1 XLR/Instrument input, 48V phantom power, USB-C | Connect microphones and instruments to computer |
| Microphone | Audio-Technica AT2020 | $99-119 | Condenser, 20Hz-20kHz frequency response, 144dB SPL | Vocal and instrument recording |
| Headphones | Sony MDR-7506 | $99-109 | Closed-back, 10Hz-20kHz response, 63 ohm impedance | Monitoring and mixing audio |
| DAW Software | Reaper | $60 | 64-bit, unlimited tracks, VST/AU support, 60-day trial | Recording, editing, and mixing software |
| Cables | XLR and TRS Cables | $25-35 | 20ft XLR male to female, 1/4 inch TRS | Connect microphone and headphones to interface |
| Pop Filter | Aokeo Professional Pop Filter | $15-20 | 6-inch dual mesh, flexible gooseneck, clamp mount | Reduce plosive sounds during recording |
| Microphone Stand | InnoGear Boom Arm | $25-35 | Adjustable boom arm, desk clamp, 360-degree rotation | Position microphone for optimal recording |
| Total Setup Cost | Complete Bundle | $443-458 | All essential components included | Functional home recording studio |
Audio Interface: Your Studio's Central Hub
The audio interface serves as the bridge between your analog instruments and digital recording software. For budget home recording studio setups, prioritize interfaces with clean preamps and reliable drivers. The Focusrite Scarlett Solo ($120-130) offers excellent value with one XLR input and direct monitoring capabilities. If you need multiple inputs, consider the PreSonus AudioBox USB 96 ($99-109) which provides two combo inputs for simultaneous recording.
Key features to look for in budget recording equipment include zero-latency monitoring, phantom power for condenser microphones, and compatibility with your chosen DAW. These interfaces typically include bundled software packages that add significant value to your home studio setup.
Microphone Selection: Capturing Quality Audio
Your microphone choice dramatically impacts recording quality. For versatile home recording studio applications, large-diaphragm condenser microphones excel at vocals and acoustic instruments. The Audio-Technica AT2020 ($99-109) delivers professional results with excellent frequency response and low self-noise.
Dynamic microphones like the Shure SM58 ($100-110) provide durability and excellent rejection of background noise, making them ideal for louder sources and untreated rooms. Consider your primary recording needs when selecting between condenser and dynamic options for your budget recording equipment arsenal.
Headphones and Monitoring Solutions
Accurate monitoring is essential for making proper mix decisions in your home studio setup. Closed-back headphones prevent audio bleed during recording sessions, while open-back designs offer more natural soundstage for mixing tasks.
The Sony MDR-7506 ($100-110) remains an industry standard for tracking, offering excellent isolation and balanced frequency response. For mixing applications, the Audio-Technica ATH-M40x ($99-109) provides detailed sound reproduction across the frequency spectrum.
Studio monitors can enhance your setup but aren't essential for beginners. If budget allows, the PreSonus Eris E3.5 ($100-120) offers decent nearfield monitoring for small spaces.
Cables and Accessories: The Often Overlooked Essentials
Quality cables ensure reliable signal transmission and prevent unwanted noise in your recordings. Budget approximately $50-70 for essential cables including XLR for microphones, TRS for instruments, and USB for your audio interface connection.
A sturdy microphone stand ($25-35) and pop filter ($15-25) complete your vocal recording setup. These accessories significantly improve recording quality by reducing handling noise and plosive sounds that can ruin otherwise perfect takes.
Smart Shopping Strategies for Maximum Value
Timing your purchases strategically can stretch your budget further. Black Friday, end-of-year sales, and manufacturer promotions often provide 20-30% discounts on home recording studio equipment. Consider certified refurbished items from reputable dealers to access higher-tier equipment within your budget constraints.
Bundle deals frequently offer better value than individual purchases. Many audio interface manufacturers include software, plugins, and sample libraries that would cost hundreds separately. Factor these additions when comparing budget recording equipment options.
Building Your Setup Gradually
If $500 feels overwhelming as a single purchase, consider a phased approach to building your home studio setup. Start with an audio interface and microphone for basic recording capabilities, then add monitoring solutions and accessories as budget allows.
This graduated approach allows you to begin recording immediately while spreading costs over several months. You'll also gain experience with each component, making informed decisions about future upgrades based on your actual recording needs rather than theoretical requirements.
Remember that the best budget recording equipment is the gear you'll actually use consistently. Focus on reliable, well-reviewed options that match your recording style and musical goals rather than chasing specifications that may not impact your specific applications.
Setting Up Your Home Recording Studio: Step-by-Step Assembly Guide
With your equipment selected and budget allocated, it's time to transform your space into a functional home recording studio. This comprehensive setup guide will walk you through the entire process, from initial room preparation to recording your first track.
Room Preparation and Acoustic Treatment
Before connecting any equipment, prepare your recording space for optimal sound quality. Choose a room with minimal external noise and hard surfaces that can cause unwanted reflections. Corner placement works well for most home studio setups, as it naturally reduces some room resonances.
Implement basic acoustic treatment using household items and budget-friendly solutions. Hang thick blankets or comforters on walls behind your recording position to absorb reflections. Position bookshelves with books at varying depths to create natural diffusion. Place rugs or carpets on hard floors to reduce foot noise and floor reflections.
Equipment Connection and Configuration
Begin with your audio interface as the central hub of your home recording studio setup. Connect the USB cable from your interface to your computer, ensuring you're using a USB 2.0 or higher port for optimal performance. Install the manufacturer's drivers before connecting to avoid potential conflicts.
Connect your microphone to Input 1 on your audio interface using an XLR cable. If using a condenser microphone, enable phantom power on your interface. Connect your studio headphones to the headphone output on your interface, not your computer's headphone jack, to ensure you're monitoring the actual interface signal.
For MIDI controllers, connect via USB directly to your computer. Most modern MIDI controllers are plug-and-play, requiring no additional drivers for basic functionality.
Software Setup and Optimization
Launch your chosen DAW and configure it to recognize your audio interface. Navigate to audio preferences and select your interface as both input and output device. Set your buffer size between 128-256 samples for recording to minimize latency while maintaining system stability.
Create your first project and set up basic tracks. Configure a mono audio track for vocal recording and ensure input monitoring is enabled so you can hear yourself through your headphones. Set appropriate input levels on your interface so your signal peaks around -12dB to -6dB, leaving headroom for mixing.
Budget Equipment Comparison and Final Recommendations
Your complete budget recording equipment setup should include these core components working in harmony. The audio interface serves as your conversion hub, transforming analog signals from your microphone into digital data your computer can process. Your DAW provides the software environment for recording, editing, and mixing your audio.
Quality monitoring through proper studio headphones ensures you hear accurate representations of your recordings. This is crucial for making informed mixing decisions and identifying potential issues during recording sessions.
Testing Your Home Studio Setup
Conduct thorough testing before your first serious recording session. Record a short vocal sample while monitoring through your headphones. Check for any latency issues, unwanted noise, or distortion. Adjust input gains and monitor levels as needed.
Test your MIDI controller by triggering virtual instruments within your DAW. Ensure all keys, knobs, and faders respond correctly and are properly mapped to DAW functions.
Essential Setup Checklist
Your budget home recording studio is now ready for creative work. This foundation provides everything necessary for professional-quality recordings while staying within your $500 budget. As your skills develop and projects become more complex, you can gradually upgrade individual components without rebuilding your entire setup.
Remember that great recordings come from understanding your equipment and maximizing what you have, rather than having the most expensive gear. Focus on learning your DAW thoroughly, developing good recording techniques, and creating music that showcases your artistic vision.
With this complete home studio setup, you're equipped to record vocals, instruments, podcasts, and any other audio content you envision. The key to success lies in consistent practice and experimentation with your new recording environment.
No comments yet. Be the first to share your thoughts!