

Choose the right microphone type
Your recording environment and budget dictate whether you need a USB or XLR microphone. This choice determines your setup's complexity, sound quality ceiling, and future upgrade path. Understanding the difference prevents buying gear that doesn't fit your workflow.
USB Microphones: The Plug-and-Play Standard
USB microphones are the most accessible entry point for podcasting. They contain built-in analog-to-digital converters, meaning you skip the need for an external audio interface. This simplicity makes them perfect for solo podcasters, remote interviews, or creators who record in variable environments like coffee shops or home offices.
The Samson Q2U is a standout choice because it offers both USB and XLR outputs. This hybrid design lets you start with a simple USB connection and upgrade to an XLR interface later as your needs grow. It delivers broadcast-quality dynamic sound that rejects background noise, making it forgiving of untreated rooms. For those prioritizing ease of use without sacrificing clarity, the Q2U remains a top recommendation for 2026.
XLR Microphones: The Studio Standard
XLR microphones are the backbone of professional broadcast studios. They require an audio interface to connect to your computer, which provides phantom power, preamps, and multiple input channels. This setup allows for higher fidelity audio and greater control over your signal chain.
Dynamic XLR microphones like the Shure SM7B are industry favorites for home studios. Their robust construction and excellent rejection of room noise make them ideal for untreated spaces. While they require more gear (interface, cloudlifter, cables), the investment pays off in consistent, professional-grade vocal clarity. If you plan to expand into multi-host shows or integrate other audio sources, an XLR system offers the necessary flexibility.
Matching Mic to Your Budget
Selecting the right microphone isn't just about price; it's about matching the tool to your recording space. If you have a noisy environment, a dynamic microphone (USB or XLR) will outperform a condenser mic by ignoring background chatter. If your room is quiet and treated, a condenser mic can capture more nuance and detail.
For budgets under $100, the Samson Q2U provides exceptional value. Mid-range options between $100 and $300 include the Shure MV7, which bridges the gap with both USB and XLR connectivity. High-end setups often center around the Shure SM7B or Electro-Voice RE20, paired with quality interfaces like the Focusrite Scarlett or Universal Audio Volt. Always prioritize microphone quality over accessories; a great mic in a bad room sounds worse than a good mic in a great room, but a great mic is easier to fix with software than a bad mic is to upgrade.
Interfaces and recording chains
Best Podcast Gear for works best as a clear sequence: define the constraint, compare the realistic options, test the tradeoff, and choose the path with the fewest hidden costs. That order keeps the advice usable instead of decorative. After each step, pause long enough to check whether the recommendation still fits the reader's actual situation. If it depends on perfect timing, unusual access, or a best-case budget, include a simpler fallback.
The simplest way to use this section is to keep the setup small, verify each change, and record the stable configuration before adding optional accessories.
Closed-back headphones for monitoring
Closed-back headphones are the first line of defense in a home studio. Unlike open-back models, which leak sound, closed-back designs seal the ear cup to prevent audio bleed. This isolation is critical for podcasting because it stops the microphone from picking up the audio you are listening to, keeping your recording clean and professional.
Comfort is just as important as isolation. You will likely wear these headphones for hours during recording and editing sessions. Look for models with plush ear cushions and a secure but gentle clamping force to avoid fatigue.
Sony MDR-7506
The Sony MDR-7506 is a industry standard for a reason. These headphones offer precise sound reproduction and reliable isolation, making them a favorite among broadcast engineers. They are built to last and provide the clarity needed to catch subtle audio issues.

As an Amazon Associate, we may earn from qualifying purchases.
Audio-Technica ATH-M50x
The Audio-Technica ATH-M50x provides a slightly warmer sound signature while maintaining excellent noise isolation. They are popular among content creators for their comfort during long sessions and their ability to handle a wide range of audio frequencies.

As an Amazon Associate, we may earn from qualifying purchases.
Beyerdynamic DT 770 Pro
For those prioritizing maximum isolation, the Beyerdynamic DT 770 Pro is an excellent choice. The velour ear pads are exceptionally soft, and the closed-back design blocks out external noise effectively, allowing you to focus entirely on your audio quality.

As an Amazon Associate, we may earn from qualifying purchases.
Essential accessories and stand
A microphone is only as good as its environment. Without proper mounting and filtration, even the best mic will capture desk vibrations and harsh plosives that make audio feel amateurish. These accessories stabilize your signal and clean up the sound before it ever hits your recording software.
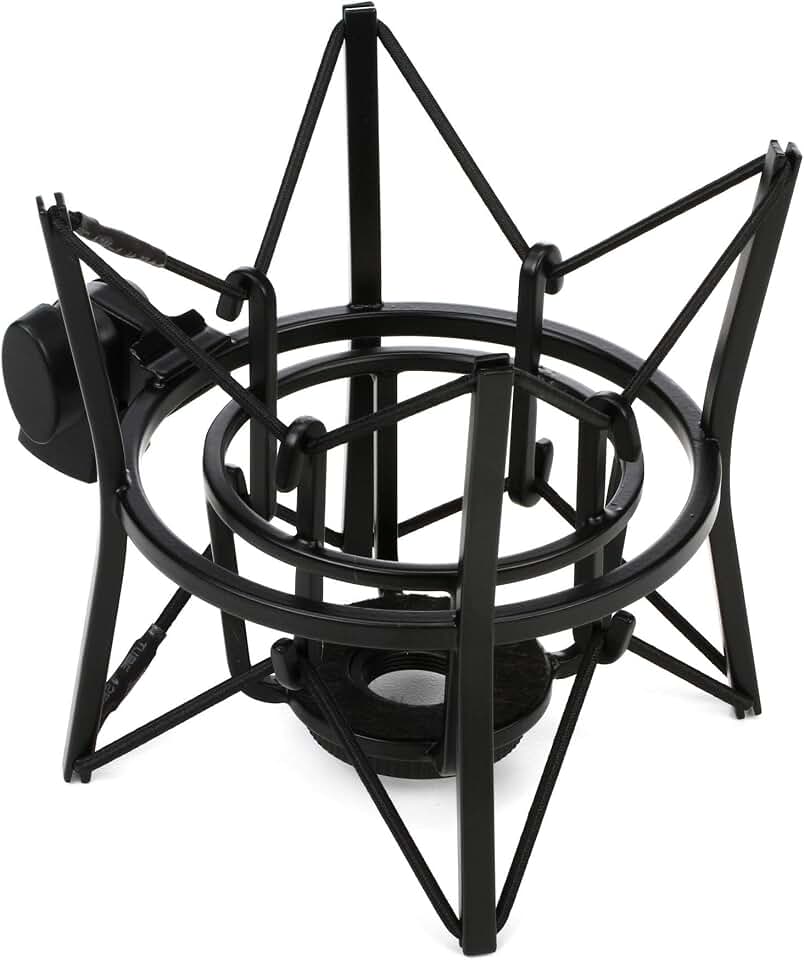
Shock mounts and pop filters
Shock mounts isolate the microphone from physical vibrations, preventing table bumps or keyboard clicks from traveling through the stand. Pair this with a pop filter to diffuse the burst of air from "p" and "b" sounds, which otherwise cause low-frequency distortion. This combination is the baseline for clear speech.
Boom arms and desk stands
A boom arm moves the microphone out of your mouth’s direct blast zone and keeps your desk clear. Look for arms with a gas spring or strong mechanical tension that holds position without drifting. A sturdy desk stand works for smaller spaces, but ensure the base is weighted enough to stay put during animated recording sessions.


As an Amazon Associate, we may earn from qualifying purchases.
Setting up your home studio space
Acoustic treatment and room placement are the invisible foundations of professional audio. You can own the best microphone in the world, but if you record in a tiled bathroom or an empty garage, the reflections will ruin your sound. The goal of a home podcast setup is not to build a soundproof fortress, but to control the early reflections that muddy your voice.
Position yourself in the "dead spot"
Every room has a sweet spot where standing waves cancel out, creating a tighter, drier sound. Avoid the center of the room, which is often the most resonant, and the corners, which trap bass frequencies. Instead, place your desk in a corner or against a wall with heavy furniture or bookshelves behind you. These irregular surfaces absorb sound rather than reflecting it back into the microphone. If you have a spare bedroom, it is often the best choice because it likely contains more soft furnishings like beds and rugs than a kitchen or office.
Treat the reflection points
You do not need full acoustic foam panels covering every wall. Focus on the first reflection points—the spots on your side walls and ceiling where sound bounces directly from your speakers or voice to your ears. A pair of 2-inch acoustic foam panels, such as the Acoustic Panels by Auralex, placed at these key points will significantly reduce flutter echo. For a budget-friendly alternative, thick moving blankets hung on heavy-duty hooks work surprisingly well. The key is to break up the flat, hard surfaces that cause that "boxy" podcast sound.
Isolate from external noise
Your home studio setup must account for the world outside your room. Close windows, seal gaps under doors with draft stoppers, and turn off air conditioning or fans during recording. If you live in a noisy area, consider recording during quieter hours. Even with good treatment, a sudden siren or dog bark can ruin a take. A simple USB condenser microphone with a cardioid pickup pattern helps reject sound from the rear, focusing only on your voice.
Check your room with a pre-recording test
Before buying gear, test your space. Record a 30-second test clip reading a paragraph of text. Listen back with headphones. If you hear a ringing or hollow quality, you need more absorption. If the sound is too dead or muffled, you may have over-treated the space. This iterative process ensures your home studio setup is optimized for clarity before you commit to expensive equipment.
-
Close windows and seal door gaps
-
Place acoustic panels at first reflection points
-
Position desk away from center of room
-
Record a 30-second test clip and listen for echoes
-
Turn off fans and HVAC systems
Frequently asked: what to check next
What setup do I need for a podcast?
You only need three core items to start: a microphone, headphones, and recording software. For a home studio, the Audio-Technica ATR2100x-USB is a reliable starter because it connects via USB or XLR, letting you upgrade later. Pair it with closed-back headphones like the Sony MDR-7506 to monitor your audio without bleed. Skip expensive interfaces until your volume grows.
How much does a full podcast setup cost?
A basic podcast setup costs between $100 and $300. This covers a dynamic USB microphone, a sturdy desk stand, and a pop filter. You can find bundled kits that include all these essentials for under $150. Avoid spending more than $500 on hardware in year one; your content quality matters far more than your gear.
How much does a podcast with 10,000 listeners make?
Earnings vary wildly based on your niche and audience engagement. A podcast with 10,000 consistent monthly listeners might earn $200 to $1,000 per month through sponsorships. Some creators supplement this with affiliate links for gear like the Yeti microphone or premium editing subscriptions. Direct listener donations via Patreon often provide a steadier income stream than ads for small shows.
No comments yet. Be the first to share your thoughts!