
Start with the right room
Before you buy a microphone or interface, look at the walls. The acoustic treatment and placement of your equipment matter more than expensive gear. A treated corner is more effective than treating the center of the room. Focus on first reflection points to stop sound from bouncing back into your microphone.
A home recording studio lives or dies by its space. Hard surfaces create echoes that muddy your tracks. Soft panels absorb that energy. Bass traps in corners control low-end rumble. These changes are invisible but immediately audible.
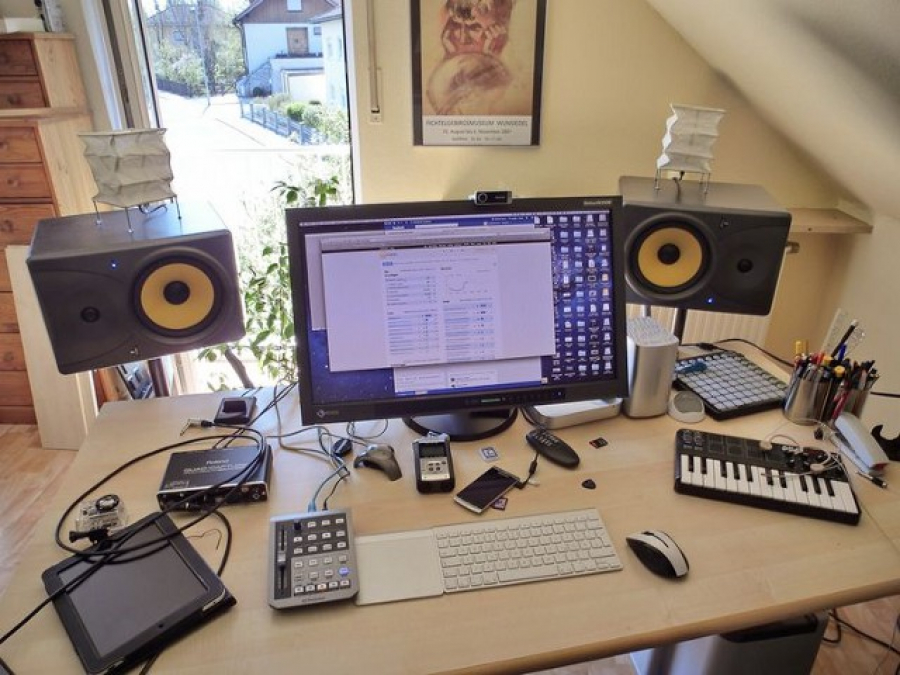
Place your monitors in a triangle around your ears. Keep them at ear level. Step back from the wall to reduce standing waves. This setup creates a stable listening position.
Pick a condenser or dynamic mic
Choosing the right microphone is the first real decision in building a home recording studio. The two main categories—condenser and dynamic—serve different acoustic needs, and picking the wrong one can make a quiet room sound muddy or a noisy room sound unusable. Understanding how they handle sound helps you match the gear to your actual environment.
| Feature | Condenser | Dynamic |
|---|---|---|
| Sensitivity | High (picks up subtle details) | Lower (rejects background noise) |
| Power Requirement | Phantom power (48V) | None required |
| Ideal Environment | Treated, quiet rooms | Untreated, noisy rooms |
| Best For | Acoustic instruments, vocals | Guitar amps, drums, voiceovers |
Condenser microphones are the workhorses of professional studios because they capture a wide frequency range and high sensitivity. They excel in controlled environments where you can manage reflections and background noise. If you have a treated room, a condenser will give you the detailed, airy sound expected in modern home recording studio projects. They are particularly effective for capturing the nuance of acoustic guitars, pianos, and clear vocal performances.
Dynamic microphones are built for durability and noise rejection. Because they are less sensitive, they ignore the hum of your computer fan or the traffic outside your window. This makes them the practical choice for untreated spaces or shared apartments. While they may lack the ultra-high-frequency sparkle of a condenser, they deliver a solid, consistent signal that is forgiving of poor room acoustics.
For most beginners starting a home recording studio, a dynamic microphone is the safer initial investment. It requires less acoustic treatment to sound good and is more forgiving of recording mistakes. However, if you already have a quiet, insulated space and want to record acoustic instruments or detailed vocals, a large-diaphragm condenser is the superior tool for the job.
Choose an audio interface
The audio interface is the bridge between your microphones and your computer. It converts analog signals into digital data, and the quality of its preamps determines whether your voice sounds clear or muddy. For a home recording studio, you need an interface that matches your mic count and fits your budget without compromising on signal clarity.
Start by counting your microphones. If you record solo podcasts or voiceovers, a two-input interface is usually sufficient. If you plan to record drums or multiple musicians, look for four or more inputs. USB-C connectivity is standard now, but ensure your computer has the right ports. Preamp quality matters more than the number of knobs; clean gain allows you to record quietly without adding noise.
Top Picks for Every Budget
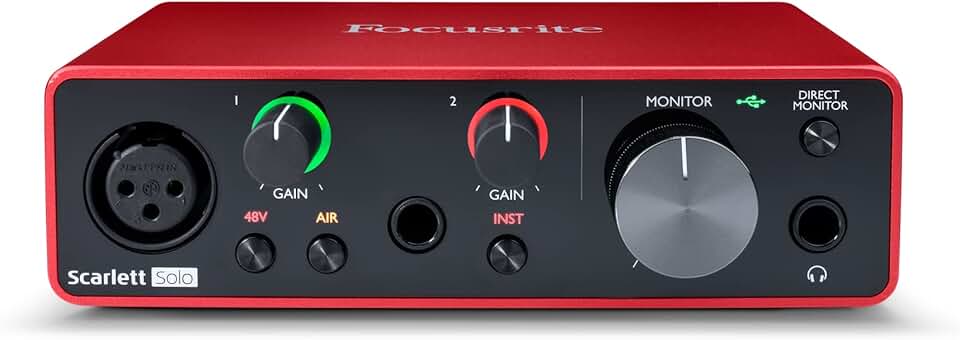
Focusrite Scarlett Solo (3rd Gen) Best for solo creators who need one clean preamp and simple controls.
PreSonus AudioBox USB 96 A durable, no-nonsense option for beginners on a tight budget.

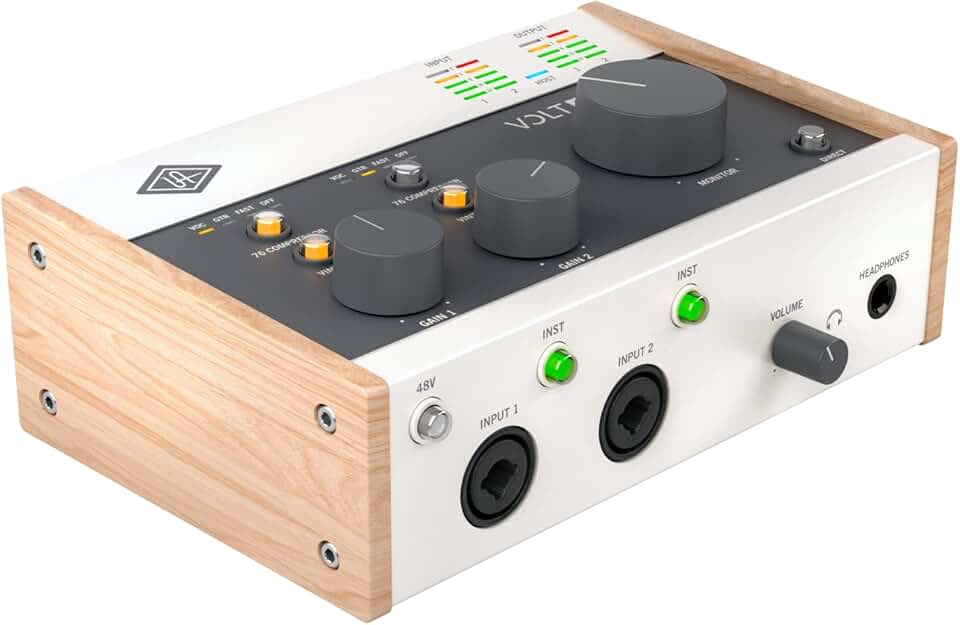
Universal Audio Volt 2 Offers analog-style warmth and built-in compression for a richer sound.
Pick studio monitors or headphones
Choosing the right monitoring setup is one of the most critical decisions when building a home recording studio. The environment matters more than the price tag. Most home studios lack the acoustic treatment required for speakers to perform correctly. In untreated rooms, bass frequencies build up in corners and reflect off hard walls, creating a muddy, inaccurate sound that misleads your mixing decisions.
For this reason, closed-back headphones are often the smarter choice for untreated spaces. They isolate external noise and prevent sound from bleeding into your microphone. This isolation is essential for tracking vocals or instruments without picking up room echo. You get a consistent, controlled listening experience regardless of your room's acoustics.
If you do opt for speakers, you must place them carefully. Position them at ear level, forming an equilateral triangle with your listening position. This setup minimizes early reflections and helps you hear the stereo image clearly. However, even with perfect placement, untreated rooms will always limit speaker performance.
Start with reliable headphones to build your mix, then verify on speakers if possible. Many professional engineers use headphones as their primary monitoring tool because they cut through the chaos of a typical home environment. The following products are proven standards for accuracy and comfort.


As an Amazon Associate, we may earn from qualifying purchases.
Set up your DAW and workflow
Your home recording studio is only as good as the software you use to capture it. The Digital Audio Workstation (DAW) is the central hub where your audio files live, so choosing the right one matters. Logic Pro is a strong choice for Mac users because it includes a full suite of virtual instruments and effects out of the box. For Windows or cross-platform flexibility, Ableton Live offers a unique workflow that feels more like an instrument than a traditional tape recorder.
Getting started doesn't require mastering every feature immediately. Focus on the basics: arming a track, setting your input levels, and hitting record. A simple recording chain—microphone into interface into DAW—lets you capture your first take without getting bogged down in mixing.
Configure your audio settings
Before you record, ensure your interface is selected as the input device in your DAW’s preferences. Set your buffer size to a low number, like 128 or 256 samples, to minimize latency while you’re tracking. This keeps the sound in your headphones tight and in time with your performance.
Arm a track and test levels
Create a new audio track and arm it for recording. Speak or sing into your microphone at your loudest expected volume. Watch the input meter and adjust your interface gain until the peaks hit around -12dB. This leaves enough headroom to prevent clipping while keeping your signal strong.
Record your first take
Hit record and play. Don’t worry about perfection yet; you’re just testing the chain. Listen back to check for clicks, pops, or timing issues. If the recording sounds clean, you’re ready to lay down the foundation of your home recording studio project.
Start with Logic Pro if you are on a Mac, or Ableton Live for cross-platform flexibility. Both offer robust toolsets for beginners and professionals alike.
Select your interface as the input device and set your buffer size to 128 or 256 samples to reduce latency during recording.
Arm a new track and speak into your mic. Adjust the interface gain so peaks hit around -12dB to avoid clipping while maintaining a strong signal.
Hit record and perform. Listen back to check for clicks or timing issues. If the audio is clean, you are ready to build your home recording studio project.
Common home recording studio: what to check next
Building a home recording studio doesn't require a mortgage or a degree in acoustics, but it does demand specific gear choices. Here are answers to the most frequent questions from aspiring producers.
Do I need a separate room for a home recording studio?
Not necessarily. While a dedicated, isolated room helps with noise control, many successful projects are recorded in treated closets or corners. The key is managing reflections. If you can't build a separate booth, use heavy blankets or acoustic panels to dampen sound waves bouncing off hard surfaces. This approach works for most bedroom setups.
What is the minimum budget for a home recording studio?
You can start with as little as $300. A reliable USB microphone like the Blue Yeti or a dynamic mic like the Shure MV7 paired with free software like Audacity or GarageBand covers the basics. Skip the expensive interface initially; many USB mics have built-in converters. Invest in a sturdy mic stand and a pop filter first to ensure clean recordings.
Is an audio interface required for a home recording studio?
For most beginners, a high-quality USB microphone is sufficient. However, an audio interface becomes essential if you plan to use XLR microphones, external preamps, or hardware synthesizers. Interfaces provide better signal-to-noise ratios and phantom power for condenser mics. Start with USB, then upgrade to an interface like the Focusrite Scarlett 2i2 when you need more inputs or lower latency.
Can I record professional audio in a non-treated room?
Yes, but you must be strategic. Place your microphone close to the sound source to minimize room pickup. Use directional mics (cardioid pattern) to reject ambient noise. Position yourself away from corners and parallel walls to reduce standing waves. Post-production EQ and compression can fix minor issues, but good recording technique matters more than expensive treatment.
No comments yet. Be the first to share your thoughts!