
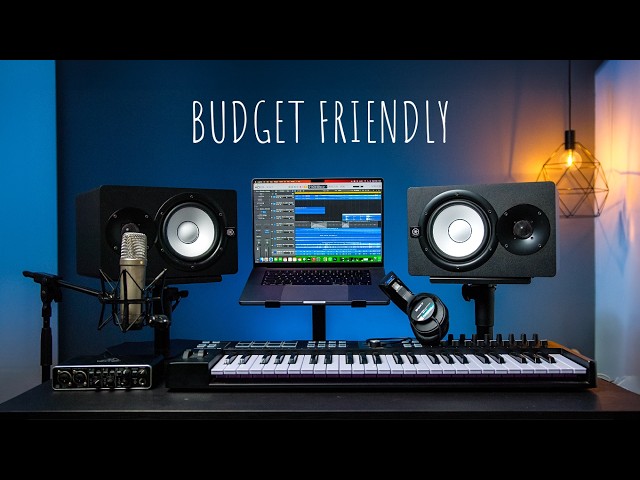
Studio Space: Beyond the Spare Room
I started my first podcast in a walk-in closet stuffed with winter coats. You don't need a soundproofed bunker to get clean audio. A bedroom corner or a quiet living area works if you treat the surfaces. Focus on what you have right now instead of waiting for a perfect room that might never happen.
Noise isolation is a major concern. External sounds – traffic, neighbors, appliances – can ruin a recording. Simple steps like sealing gaps around doors and windows, using heavy curtains, and adding rugs can make a surprising difference. You’d be surprised how much sound a door frame lets through. If you're serious, consider acoustic door seals and window inserts, but those are investments for later.
Ergonomics matter a lot, especially if you’ll be spending hours in your studio. A comfortable chair, a properly positioned monitor, and a keyboard/mouse setup that doesn't strain your wrists are essential. Think about cable management too; a tidy space is a productive space. I’ve seen too many studios hampered by a tangled mess of wires.
Don’t underestimate the power of rearranging furniture. Even moving a desk away from a wall can reduce unwanted reflections. It's not about creating a pristine, sterile environment, but about minimizing distractions and maximizing your comfort. A little planning can go a long way towards creating a space you actually want to work in.
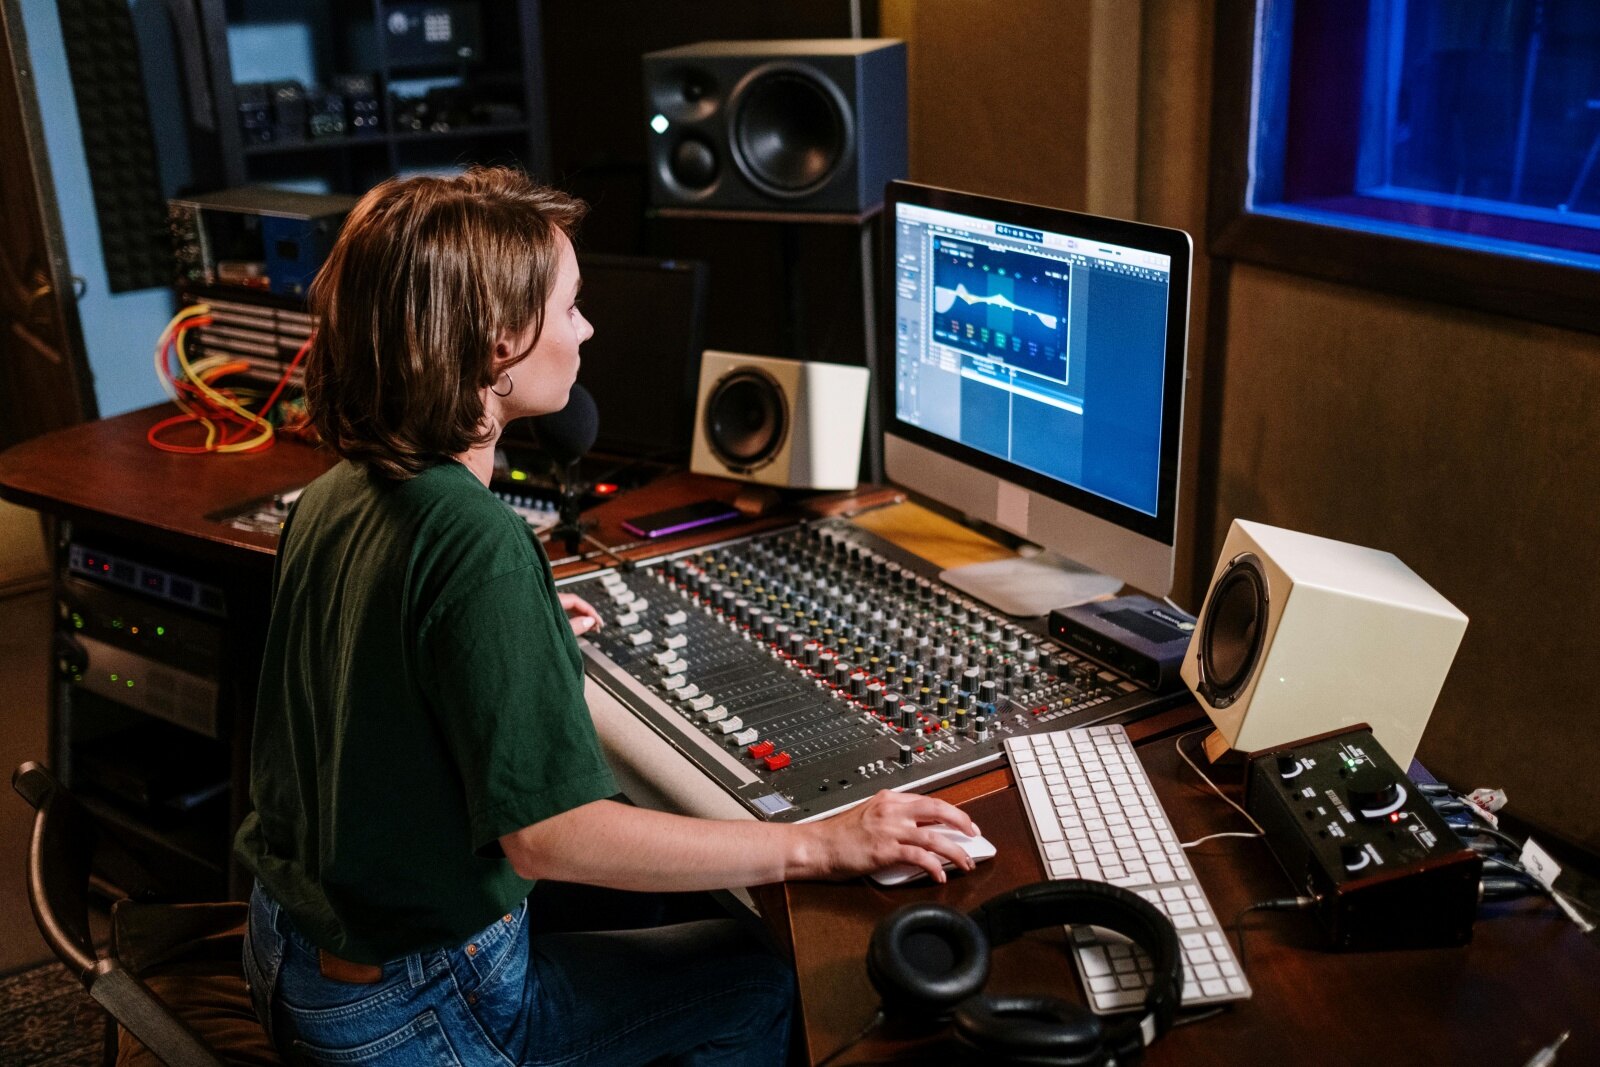
Microphones
Your microphone is arguably the most important piece of equipment in your home studio. It’s the first point of contact for your sound, and its quality will directly impact the final result. There are three main types: dynamic, condenser, and ribbon. Dynamic mics are robust and affordable, great for loud sources like vocals and drums, and don’t require external power. Condenser mics are more sensitive and offer a wider frequency response, making them ideal for vocals, acoustic instruments, and voiceovers.
Ribbon mics are known for their warm, vintage sound, but they are also fragile and generally more expensive. For podcasting, a good quality dynamic mic like the Shure SM58 or the Rode PodMic is a solid choice. For music recording, a condenser mic like the Audio-Technica AT2020 or the Rode NT-USB+ will give you more detail and clarity. The best mic depends on your specific needs and budget.
Polar patterns dictate where the mic listens. Cardioid is the standard for most of us because it ignores the noise behind the mic. Omnidirectional picks up everything in the room, while bidirectional (figure-8) is great if you're sitting across from a guest with one mic between you.
Accessories are key. A pop filter reduces plosives – those harsh 'p' and 'b' sounds – and a shock mount isolates the microphone from vibrations. I’ve found that even a simple foam windscreen can improve vocal clarity. Don't skimp on these; they're relatively inexpensive but can make a noticeable difference. A good starting point is a Shure SM58 with a basic pop filter and a desktop stand.
- The Shure SM58 is a tank that handles vocals and loud instruments without breaking.
- Rode PodMic: A popular dynamic microphone designed specifically for podcasting.
- Audio-Technica AT2020: An affordable condenser microphone for studio recording.
- Rode NT-USB+: A high-quality USB condenser microphone with a built-in pop filter.
Featured Products

Durable construction · Cardioid polar pattern for feedback rejection · Excellent for vocals and speech
This microphone is a workhorse, offering robust performance for vocalists and podcasters at an accessible price point.
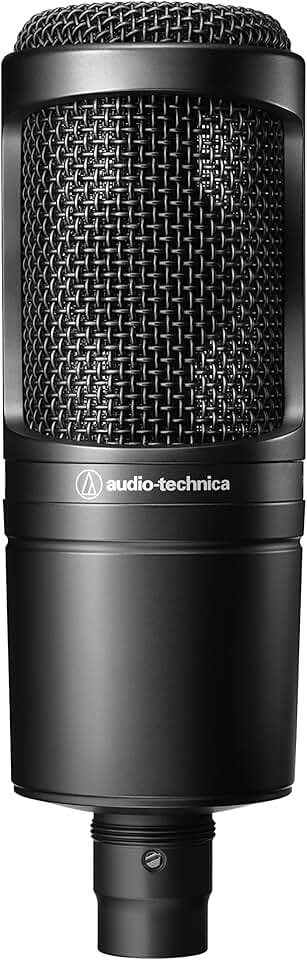
Condenser element for detailed audio · Cardioid polar pattern · Wide frequency response
The AT2020 provides studio-quality condenser sound for creators looking to capture nuanced audio for music and voiceovers.

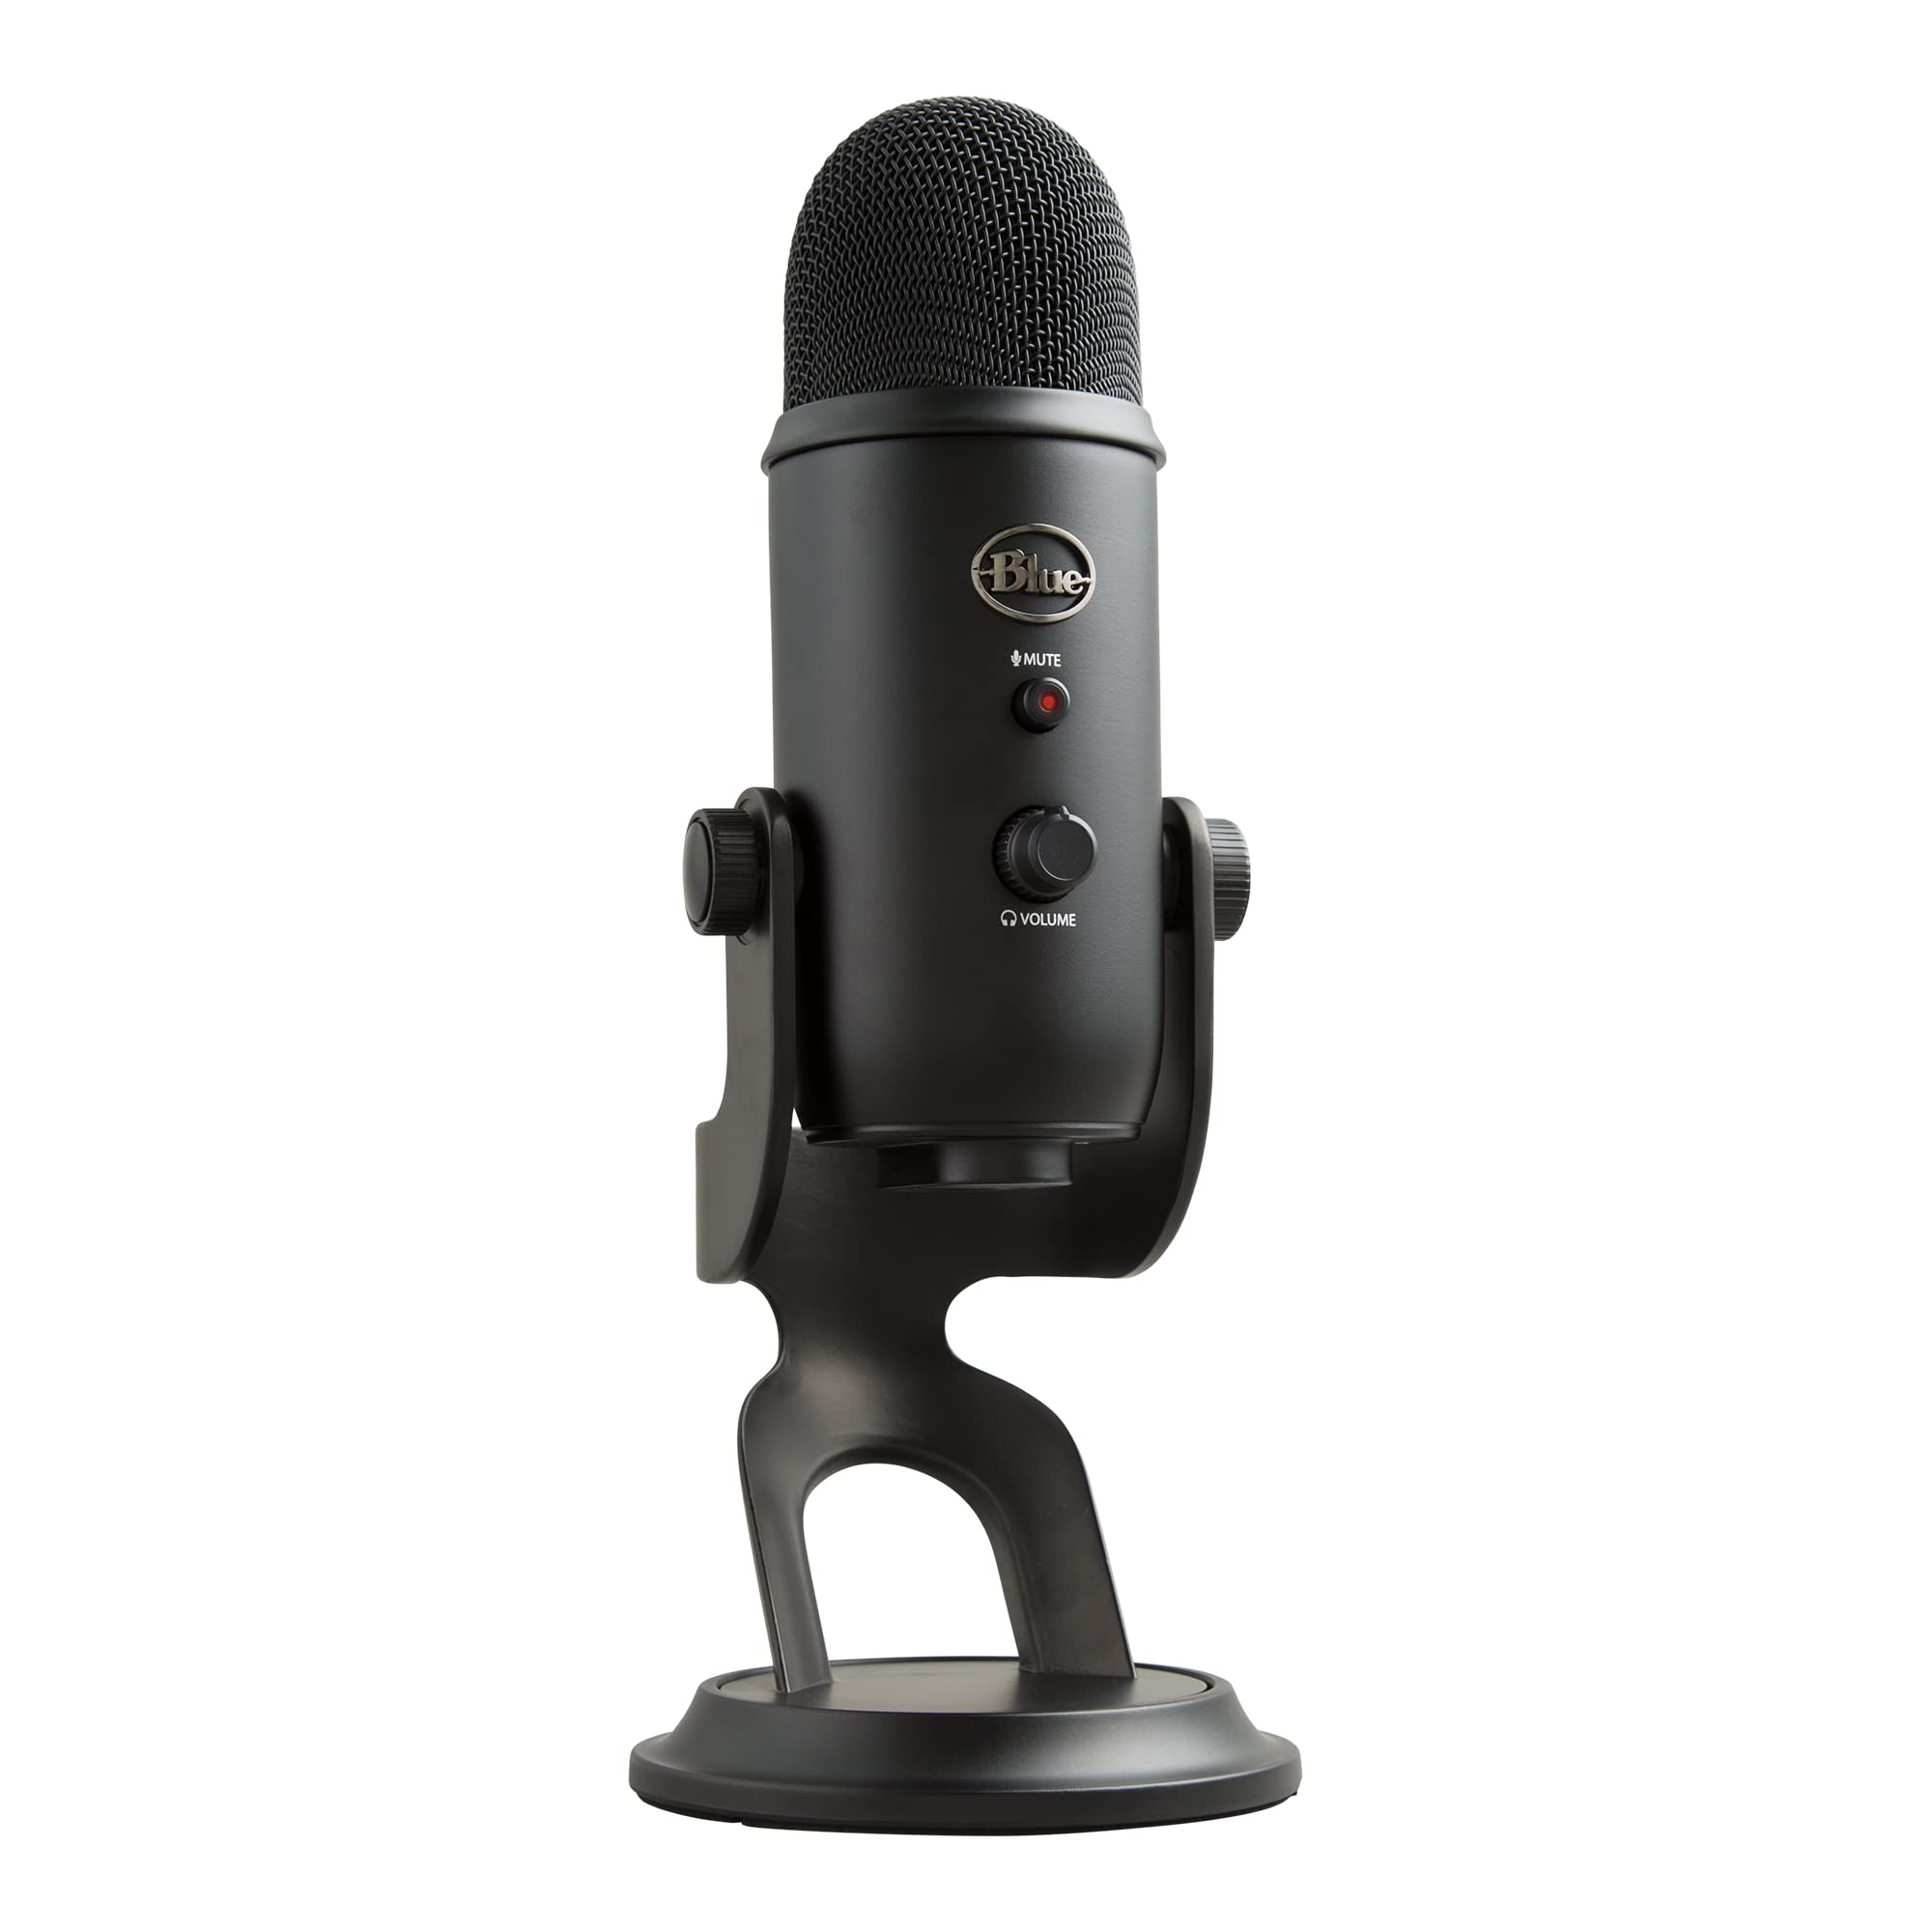
USB connectivity for plug-and-play use · Studio-grade condenser capsule · Includes pop filter and desk stand
This USB microphone simplifies the recording process by delivering exceptional audio quality without the need for an audio interface.
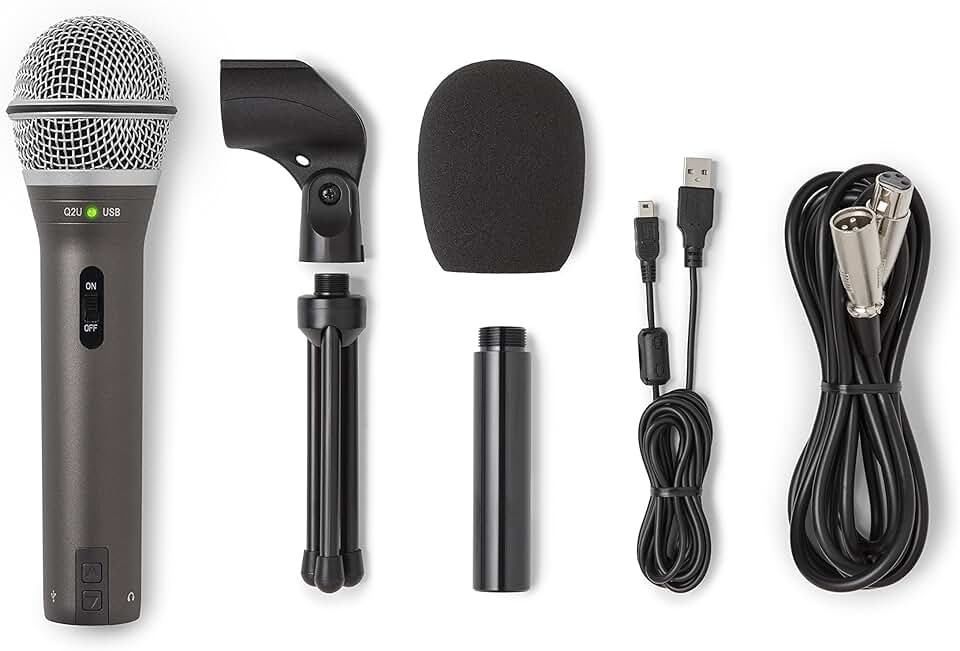
Dual USB/XLR output · Cardioid polar pattern · Includes essential accessories for immediate use
The Samson Q2U is an excellent all-in-one solution, offering the flexibility of both USB and XLR connections for podcasters and voiceover artists on a budget.
These microphones offer a range of options for podcasting, music recording, and voiceovers, catering to different budgets and recording needs for content creators.
As an Amazon Associate I earn from qualifying purchases. Prices may vary.
Audio interfaces
An audio interface is the bridge between your microphones and your computer. It converts analog audio signals to digital for recording and digital signals back to analog for playback. While your computer has a built-in sound card, it’s generally not designed for the quality and flexibility needed for serious recording. An audio interface provides better preamps, lower latency, and more input/output options.
Key features to consider include the number of inputs and outputs – how many microphones and instruments you can connect simultaneously – and whether it provides phantom power, which is needed for condenser microphones. Latency, the delay between playing a sound and hearing it back, is also critical; lower latency is better. USB is the most common connection type, but Thunderbolt offers even lower latency and higher bandwidth.
For a solo creator, a simple 2-in/2-out interface like the Focusrite Scarlett 2i2 or the PreSonus AudioBox USB 96 is a great starting point. If you plan to record multiple instruments or a band, you’ll need an interface with more inputs. The Universal Audio Apollo Twin is a popular choice for those seeking professional-grade sound, but it comes at a higher price point.
I’ve personally used both Focusrite and PreSonus interfaces, and I’ve been consistently impressed with their sound quality and reliability. Don’t underestimate the importance of driver stability; check online forums to see if other users have reported issues with a particular interface before you buy.
- Focusrite’s Scarlett 2i2 is the most common 2-in/2-out USB interface for a reason—it just works.
- PreSonus AudioBox USB 96: Another affordable and reliable 2-in/2-out USB interface.
- Universal Audio Apollo Twin: A professional-grade Thunderbolt audio interface with high-quality preamps.
Audio Interface Comparison - 2026
| Interface | Inputs/Outputs | Connectivity | Key Features | Best For |
|---|---|---|---|---|
| Focusrite Scarlett Series | Versatile, typically 2-4 mic preamps + outputs | USB-C | Known for ease of use, included software bundle, generally reliable drivers | Both (especially beginner-friendly) |
| Universal Audio Volt Series | Generally 2-4 mic preamps + outputs | USB-C | Vintage preamp modeling, excellent sound quality, streamlined design | Music (vocal and instrument recording) |
| PreSonus AudioBox Series | Often 2 mic preamps + outputs, expandable options available | USB-C | Affordable, Studio One Artist integration, solid build quality | Podcasting & Music (budget-conscious creators) |
| MOTU M2 | 2 mic preamps, 4 outputs, MIDI I/O | USB-C | Low latency performance, excellent audio quality, robust construction | Music (demanding recording/mixing) |
| Audient iD Series | Typically 2 mic preamps + outputs | USB-C | High-end sound quality, Class-A console mic preamp, JFET instrument input | Music (focused on pristine audio capture) |
Qualitative comparison based on the article research brief. Confirm current product details in the official docs before making implementation choices.
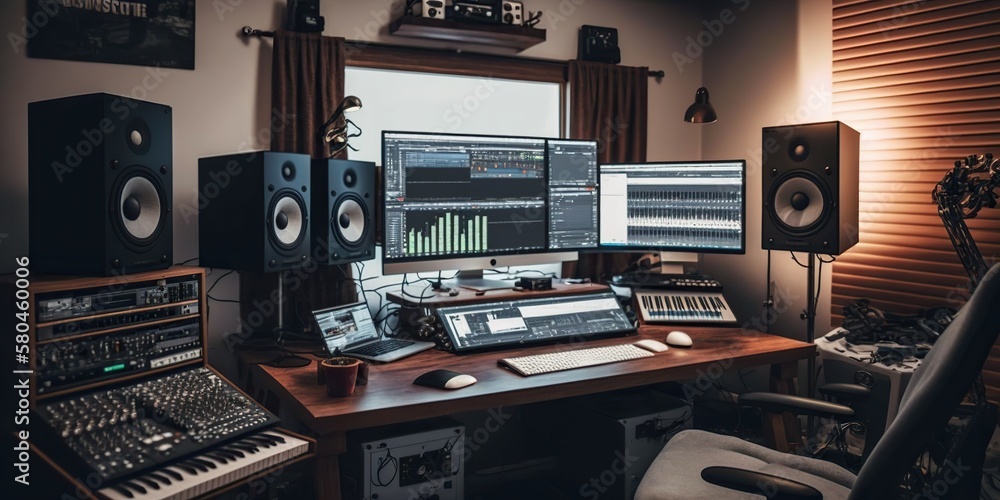
Headphones & Monitors: Critical Listening
Accurate monitoring is essential for making informed decisions during recording and mixing. Headphones and studio monitors serve different purposes. Headphones are great for tracking – recording – because they prevent sound from bleeding into the microphone. Studio monitors, also known as nearfield speakers, are designed for critical listening and allow you to hear a more accurate representation of your mix.
Headphones come in two main types: open-back and closed-back. Open-back headphones offer a more natural soundstage but leak sound, making them unsuitable for tracking. Closed-back headphones provide better isolation but can sound more boxy. For mixing, open-back headphones like the Sennheiser HD 600 are preferred. For tracking, closed-back headphones like the Audio-Technica ATH-M50x are a good choice.
Studio monitors should have a flat frequency response, meaning they don’t emphasize or de-emphasize certain frequencies. Proper placement is crucial; they should form an equilateral triangle with your listening position. The Yamaha HS8 and the KRK Rokit series are popular choices for home studios. Don’t fall into the trap of buying monitors that sound "good" – you want monitors that reveal the truth about your mix.
Budget-friendly options like the PreSonus Eris E3.5 are a good starting point. Remember that room acoustics play a significant role in how monitors sound; acoustic treatment (discussed later) is essential for accurate monitoring. I recommend starting with headphones and adding monitors later as your budget allows.
- Sennheiser HD 600: Open-back headphones for critical listening.
- Audio-Technica ATH-M50x: Closed-back headphones for tracking.
- Yamaha HS8: Popular studio monitors with a flat frequency response.
- KRK Rokit series: Another well-regarded line of studio monitors.

beyerdynamic DT 770 PRO, 80 Ohm, Closed Back, Over Ear, Wired Professional Studio Headphones, Home Recording, Podcast, Monitor, 3m Straight Cable, Black with Limited Edition Black Velour Ear Pads
- Professional-grade closed-back monitoring headphones
- 80 Ohm impedance for balanced audio reproduction
- Durable construction with comfortable, replaceable velour ear pads
- 3m straight cable for ample reach in a studio environment
The Beyerdynamic DT 770 PRO headphones are a studio staple, offering exceptional clarity and isolation crucial for detailed audio work in podcasting, music production, and video editing, making them an indispensable tool for content creators.
View on Amazon →As an Amazon Associate I earn from qualifying purchases.
Software and DAWs
A Digital Audio Workstation (DAW) is the software you’ll use to record, edit, and mix your audio. There are many options available, each with its own strengths and weaknesses. Ableton Live is popular for electronic music production and live performance. Logic Pro X is a powerful and affordable option for Mac users. Pro Tools is the industry standard for professional audio production.
GarageBand is a free DAW that comes with Macs and is a great starting point for beginners. It’s surprisingly capable and offers a gentle learning curve. Choosing the right DAW depends on your workflow and musical style. I personally use Logic Pro X because I find its interface intuitive and its features comprehensive.
Beyond the DAW itself, you’ll need plugins for EQ, compression, reverb, and other effects. Many DAWs come with a suite of built-in plugins, but you can also purchase third-party plugins for more specialized processing. Waves, FabFilter, and Soundtoys are all well-respected plugin developers.
Don’t get caught up in the endless pursuit of the "perfect" plugin. Start with the tools you have and learn to use them effectively. Mastering the fundamentals of audio processing is more important than having the latest and greatest plugins. Experiment, practice, and develop your own sound.
- Ableton Live: Popular for electronic music production.
- Logic Pro X: Powerful and affordable for Mac users.
- Pro Tools: Industry standard for professional audio.
- GarageBand: Free and beginner-friendly DAW for Mac.
Acoustic Treatment: Taming Your Room
Acoustic treatment is often overlooked, but it’s crucial for achieving a professional sound in your home studio. Untreated rooms suffer from unwanted reflections and resonances that can muddy your recordings and make mixing difficult. The goal is to reduce these problems and create a more neutral listening environment.
There are three main types of acoustic treatment: bass traps, acoustic panels, and diffusers. Bass traps absorb low-frequency sounds, which tend to build up in corners. Acoustic panels absorb mid and high frequencies, reducing reflections. Diffusers scatter sound, creating a more spacious and natural soundstage. Addressing first reflection points – the spots on your walls and ceiling where sound bounces directly from your speakers to your ears – is a good place to start.
DIY acoustic panels can be made using wood frames, insulation, and fabric. Commercial options are also available from companies like Auralex and GIK Acoustics. While it’s easy to spend a lot of money on acoustic treatment, even a few strategically placed panels can make a significant difference. I started with DIY panels and gradually added more as my budget allowed.
Don't expect acoustic treatment to magically transform your room. It’s a process of experimentation and refinement. Use a room EQ wizard to measure your room's response and identify problem areas. Start with bass traps in the corners, then add panels to address first reflections. Listen carefully and adjust as needed.
- Bass Traps: Absorb low-frequency sounds.
- Acoustic Panels: Absorb mid and high frequencies.
- Diffusers: Scatter sound for a more natural soundstage.
Cables, Stands, and Little Extras
Don't underestimate the importance of the small stuff. Cables, stands, pop filters, and other accessories can make a big difference in the functionality and organization of your home studio. XLR cables are used to connect microphones to audio interfaces. TRS cables are used for balanced line-level signals. TS cables are used for unbalanced instrument signals.
A good microphone stand is essential for positioning your microphone correctly. Boom arms offer more flexibility than traditional stands. A pop filter reduces plosives, and a shock mount isolates the microphone from vibrations. A headphone amplifier can provide more power and clarity to your headphones, especially if you're using high-impedance headphones.
Cable management is crucial for keeping your studio tidy and preventing accidents. Cable ties, sleeves, and organizers can help you keep your cables under control. A power conditioner can protect your equipment from voltage fluctuations and noise. I’ve found that investing in quality cables and accessories is worth the money in the long run.
Consider a small tool kit with basic tools like screwdrivers, pliers, and wire cutters. You’ll inevitably need to make adjustments or repairs at some point. A comfortable chair, a good desk lamp, and a few plants can also make your studio a more pleasant place to work.
- XLR Cables: For microphones and audio interfaces.
- TRS Cables: For balanced line-level signals.
- TS Cables: For unbalanced instrument signals.
- Microphone Stand: Essential for positioning your microphone.
- Pop Filter: Reduces plosives.
- Shock Mount: Isolates microphone from vibrations.
Essential Home Studio Gear for Content Creators in 2026

2-pack of 10ft XLR to XLR cables · Male to Female connectors · Oxygen-Free Copper (OFC) for signal clarity
These reliable XLR cables ensure a clean and stable connection between your microphones and audio interface.

Adjustable boom arm for optimal microphone placement · Sturdy desk mount clamp · Integrated cable management
This boom arm provides flexible positioning for your microphone, keeping your workspace tidy and professional.

Dual-layer pop filter design · Flexible 360° gooseneck arm · Universal clip-on mount
A pop filter is crucial for reducing plosive sounds and improving vocal clarity in recordings.

4-channel headphone amplification · Stereo audio input with bass boost · 1/4" and 1/8" headphone outputs
This amplifier allows multiple creators to monitor audio simultaneously with individual volume control and enhanced sound.

Portable power conditioner · Surge protection · Noise filtration
Protect your valuable audio equipment from power surges and reduce electrical noise for cleaner recordings.
As an Amazon Associate I earn from qualifying purchases. Prices may vary.

No comments yet. Be the first to share your thoughts!