
Why remote recording is the new standard
The old model of gathering in a physical studio doesn't scale. If you want to interview a specific expert or a storyteller across the country, you can't wait for a tour date. Remote recording is the only way to keep a consistent weekly schedule without a massive travel budget.
The demand for diverse voices and expert guests often means looking beyond geographical limitations. Relying solely on local guests severely restricts your options. Remote recording unlocks access to anyone with an internet connection, allowing you to build a more compelling and informative show. It’s also a significant cost saver, eliminating studio rental fees and travel expenses.
Scheduling conflicts are another major hurdle that remote recording readily solves. Coordinating multiple people’s schedules for a studio session can be a logistical nightmare. Remote recording provides flexibility, allowing guests to participate from anywhere, at a time that works for them. This shift addresses core problems of access, cost, and convenience, making it a fundamental change in how podcasts are produced.
The best software for remote sessions
Several platforms are designed specifically for remote podcast recording. Riverside.fm, SquadCast, and Zencastr are popular choices, each offering unique features. A standout feature of these platforms is their ability to record each participant’s audio locally – meaning each guest records their own track directly on their computer. This results in significantly higher audio quality compared to relying on a single, shared recording.
Riverside.fm is my go-to because it backs up files locally as you record—if a guest's internet cuts out, you don't lose the interview. SquadCast is similar but feels more geared toward editors who want deep track isolation. If you're broke, Zencastr has a free tier, but the paid versions of Riverside ($15/mo) or SquadCast ($20/mo) are worth it for the stability alone.
If you’re on a tight budget, you can use general conferencing tools like Zoom, Google Meet, or Skype in combination with separate recording software like Audacity or GarageBand. However, this approach has significant downsides. Audio quality is typically lower, as the recording relies on the platform’s compression algorithms. Post-production work is also more extensive, as you’ll need to manually separate and edit each track. While feasible, it's not ideal for professional-sounding podcasts.
Consider what your priorities are. If audio quality and ease of use are paramount, a dedicated remote recording platform is the way to go. If you’re just starting out and experimenting, using conferencing software with Audacity or GarageBand can be a viable, if less optimal, solution.
Microphones: Your First Investment
Your microphone is the most important piece of equipment for podcasting. It directly impacts the quality of your audio, and a good microphone can make a world of difference. There are two main types of microphones: dynamic and condenser. Dynamic microphones are more durable and better at rejecting background noise, making them a good choice for less-than-ideal recording environments. Condenser microphones are more sensitive and capture a wider range of frequencies, resulting in a more detailed sound.
For remote podcasting, USB microphones are often the simplest option, as they connect directly to your computer. However, XLR microphones offer superior audio quality and flexibility, but require an audio interface (more on that later). A popular USB option is the Rode NT-USB+, currently around $170. For an XLR setup, the Shure SM58 is a reliable dynamic microphone at around $100, while the Audio-Technica AT2020 is a well-regarded condenser microphone costing approximately $100.
Don't forget accessories! A pop filter helps to reduce plosives (those harsh "p’ and ‘b" sounds) and a shock mount isolates the microphone from vibrations. These are relatively inexpensive investments that can significantly improve your audio quality. A decent pop filter can be found for around $20, and a shock mount for around $30. Prioritize the microphone itself, but don't skimp on these essential accessories.
- Rode NT-USB+ ($170). A plug-and-play USB mic that sounds better than most entry-level XLRs.
- Shure SM58: XLR dynamic microphone, approximately $100
- Audio-Technica AT2020: XLR condenser microphone, approximately $100
- Pop Filter: Approximately $20
- Shock Mount: Approximately $30
Featured Products

Studio-quality condenser capsule · USB-C connectivity · Headphone output for zero-latency monitoring
This microphone provides excellent audio fidelity and ease of use, perfect for podcasters needing professional sound from any location.

Multiple pickup patterns (cardioid, bidirectional, omnidirectional, stereo) · Built-in headphone amplifier · Plug-and-play USB connectivity
Its versatility in pickup patterns and user-friendly design make the Blue Yeti a great option for diverse remote podcasting setups.

Hybrid USB-C and XLR connectivity · Auto Level Mode for consistent output · Digital Pop Filter
The MV7+ combines professional audio quality with smart features that simplify remote recording and ensure a polished sound.

Cardioid condenser element for clear sound · USB output for direct connection · Headphone jack with volume control
This microphone offers exceptional clarity and a straightforward setup, making it a reliable tool for capturing high-fidelity remote podcast recordings.
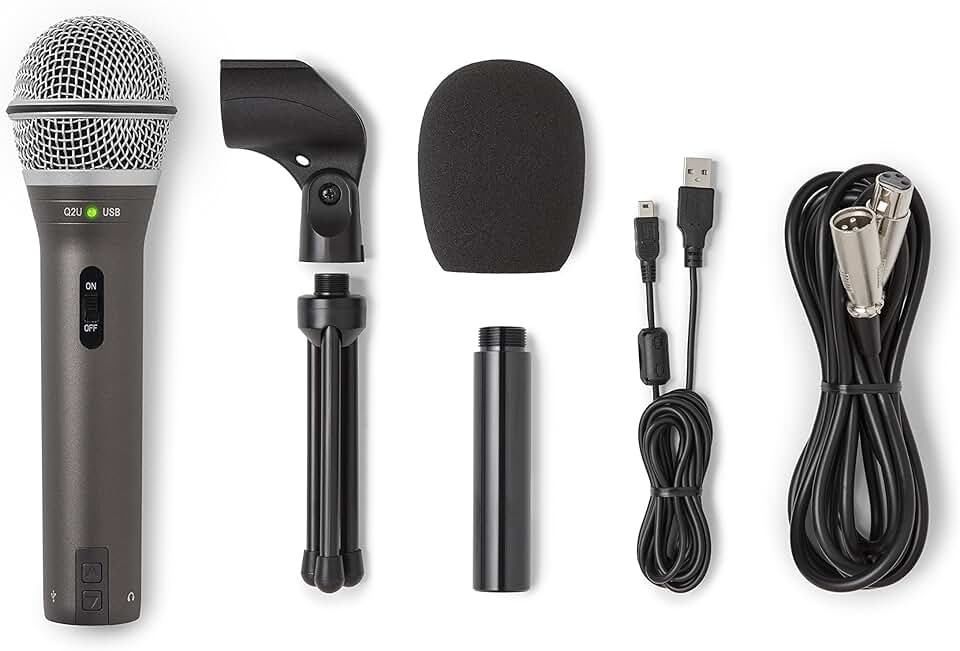
Dual USB/XLR outputs · Dynamic microphone capsule · Built-in headphone jack
The Q2U's dual connectivity and included accessories offer great value and adaptability for podcasters recording from multiple locations on a budget.
As an Amazon Associate I earn from qualifying purchases. Prices may vary.
Headphones: Monitoring and Isolation
Headphones are often overlooked, but they’re absolutely crucial for remote podcast recording. They allow you to monitor your own audio in real-time, ensuring that you’re speaking at the right level and that there are no unwanted noises. More importantly, they prevent audio from your speakers from bleeding into your microphone, which can cause feedback loops and ruin the recording.
Closed-back headphones are generally preferred for podcasting because they provide better isolation, blocking out external sounds and preventing audio leakage. Open-back headphones offer a more natural soundstage, but they’re not ideal for recording. A solid choice is the Audio-Technica ATH-M50x, currently around $150, or the Sony MDR-7506, around $100. Comfort is also important, as you’ll likely be wearing them for extended periods.
Headphone impedance is another factor to consider, particularly if you’re using an audio interface. Lower impedance headphones (32 ohms or less) are easier to drive and work well with most devices. Higher impedance headphones (250 ohms or more) require more power and may need a dedicated headphone amplifier.
Internet speeds and audio interfaces
A stable internet connection is the foundation of any successful remote recording session. Wired connections (Ethernet) are always preferable to Wi-Fi, as they offer more reliability and lower latency. Aim for an upload speed of at least 5 Mbps, but 10 Mbps or higher is recommended for optimal performance. Test your internet speed regularly to ensure it’s meeting your needs.
An audio interface is a device that connects your XLR microphone to your computer. It converts the analog signal from the microphone into a digital signal that your computer can understand. Audio interfaces also provide phantom power for condenser microphones and allow you to control gain levels. The Focusrite Scarlett 2i2 is a popular and affordable option, costing around $160.
Latency – the delay between when you speak and when the audio is heard – can be a major issue with remote recording. Minimizing latency requires a combination of a stable internet connection, a good audio interface, and optimized software settings. Most remote recording platforms have built-in latency compensation features, but it’s still important to be aware of the issue.
Best Practices: Recording Like a Pro
Setting proper gain levels is crucial. You want your audio to be loud enough to be clear, but not so loud that it distorts. Aim for a peak level of around -6dBFS. Minimize background noise by recording in a quiet room, closing windows and doors, and turning off any noisy appliances. Acoustic treatment – adding sound-absorbing materials to your room – can further reduce reflections and improve audio quality.
Using a script or outline can help you stay on track and avoid rambling. Conduct a sound check with your guests before you start recording to ensure that everyone’s audio levels are balanced and that there are no technical issues. Clear communication is key. Let your guests know what to expect and encourage them to speak clearly and at a consistent volume.
Encourage guests to use headphones. Seriously. It's the biggest single thing you can do to improve the quality of a remote recording. Remind them to mute other applications on their computer that might generate noise. A pre-recording checklist can be invaluable to ensuring a smooth session.
- Set proper gain levels (aim for -6dBFS)
- Record in a quiet room
- Use a script or outline
- Conduct a sound check
- Ensure guests use headphones
Editing & Post-Production Workflow
Editing remote recordings requires a bit more work than editing studio recordings. Software options include Audacity (free and open-source), Adobe Audition (subscription-based), and Descript (subscription-based, focuses on transcription-based editing). Noise reduction, leveling, and mixing are essential steps in the post-production process.
Remote recordings often suffer from inconsistent audio levels, as guests may be using different microphones and recording environments. Leveling ensures that everyone’s audio is at a consistent volume. Noise reduction can remove unwanted background noise, such as hums and hisses. Mixing involves blending the different audio tracks together and adding any desired effects.
A common challenge with remote recordings is dealing with dropouts or glitches. If a guest’s audio cuts out momentarily, you may need to edit around it or use noise reduction to minimize the impact. Being prepared to do some creative editing is part of the process.
Troubleshooting Common Issues
Audio drift – where the audio from different participants gradually falls out of sync – can be corrected in most editing software. Look for a "time stretch’ or ‘warp’ feature. Dropouts are often caused by internet connectivity issues. Encourage guests to use a wired connection and close unnecessary applications. Echo is usually caused by one participant"s audio leaking into their microphone. Ensure everyone is using headphones.
Feedback loops occur when audio from speakers is picked up by a microphone. This is almost always a headphone issue. Double-check that everyone is wearing headphones. If you’re still experiencing problems, try reducing the volume or adjusting the microphone placement. These issues aren’t uncommon, but with a little troubleshooting, they can usually be resolved.
- Audio Drift: Use time stretch/warp features in editing software.
- Dropouts: Wired connection, close unnecessary apps.
- Echo: Ensure headphones are used.
- Feedback Loops: Check headphone usage, adjust volume/placement.


No comments yet. Be the first to share your thoughts!